Home Screen
Once you have logged into Vital Select, you will be directed to the Home Screen. Here you can see basic information about your register and take various actions.
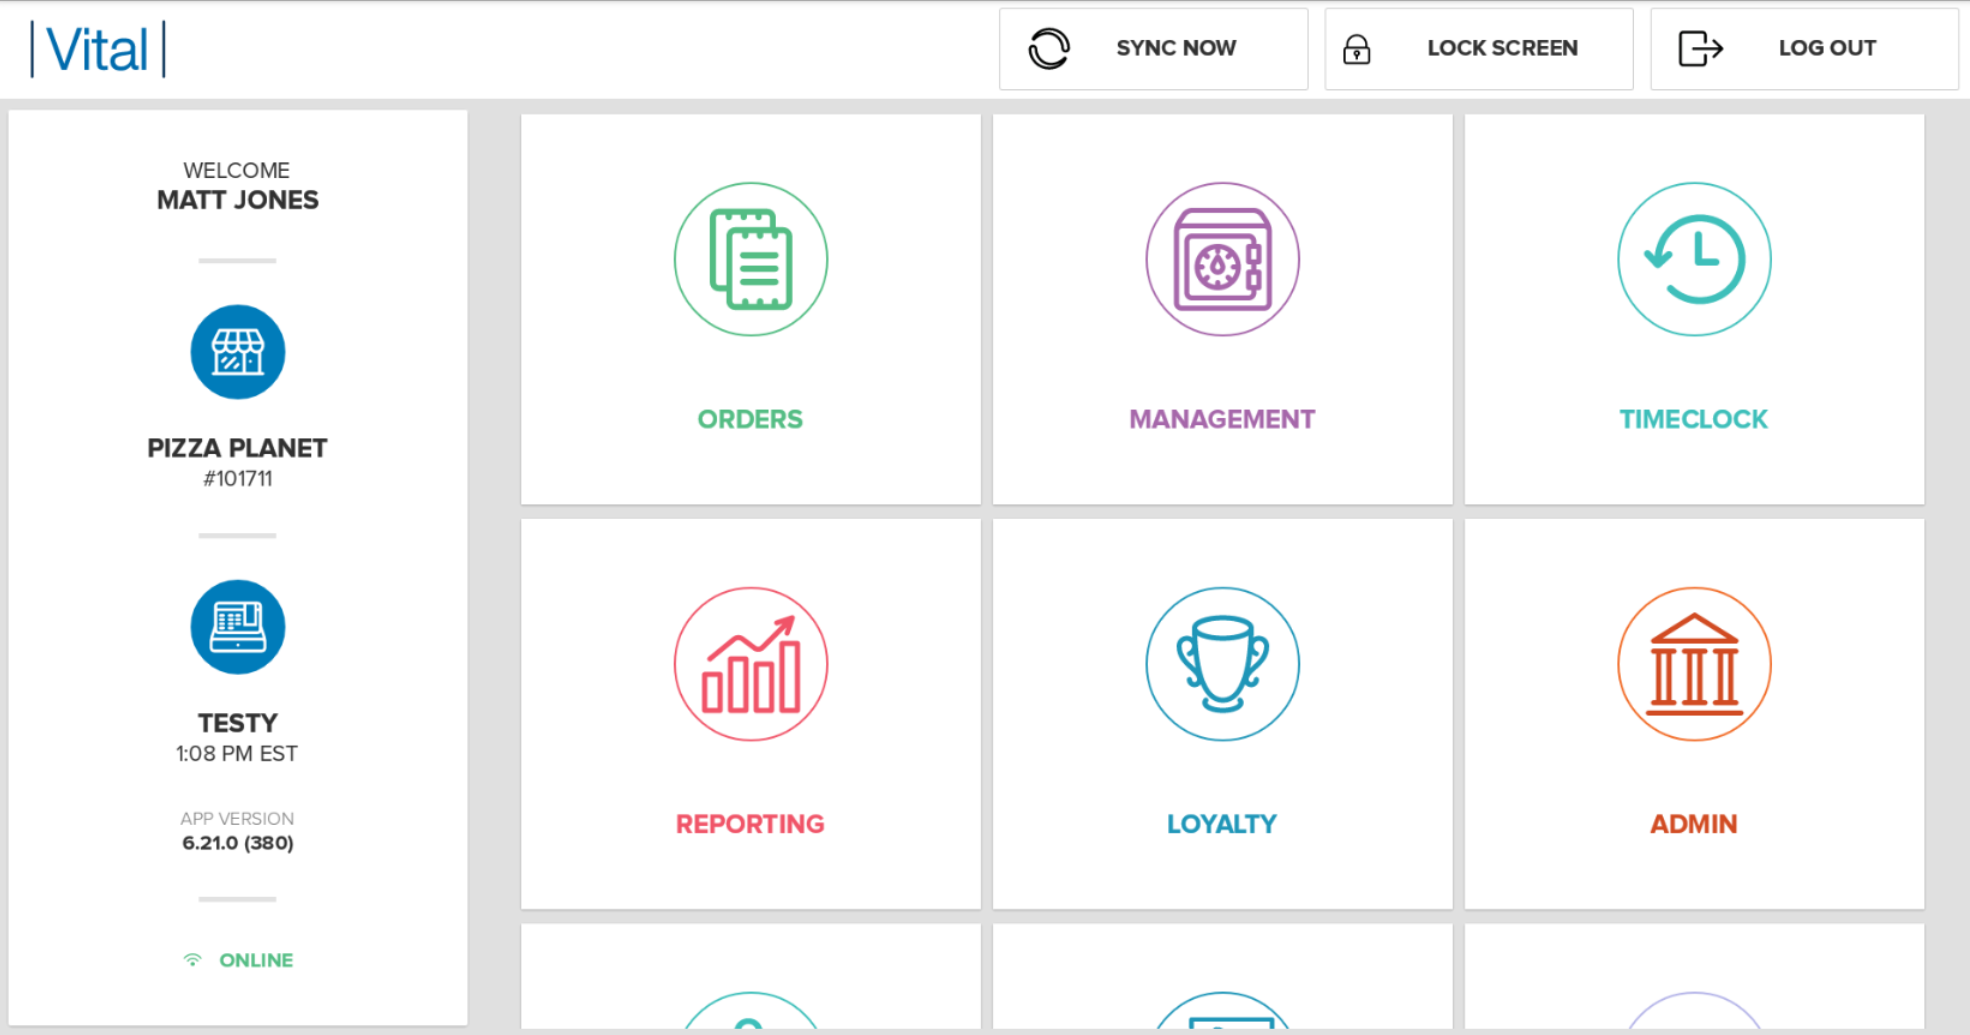
Information Panel
On the left side of the screen you will see the Information Panel. This panel displays the name of the current user, the Location Name and Account ID, the Register Name and Register Time, the App Version, and the Online/Offline Status. This information will be useful to have available if you ever need to contact support.
Primary Buttons
Note:
These buttons are displayed based on account permissions. A user that is a Cashier may only see the Orders Button, whereas a user that is an Admin will see all of the available buttons.
Orders
Selecting the Orders Button launches the Orders Screen, which allows the user to:
- Create and checkout Orders,
- Place orders on Hold and manage Held Orders,
- Manage Completed Orders, perform refunds, and re-print or re-send receipts.
- Manage Gift Cards
Only Users with the "Allow users to access POS Orders" permission will see the Orders Button.
Management
The Management Button launches the Management Screen where you can:
- View your X Report and perform cash drawer actions like Cash In, Cash Out, Safe Drop, pay out credit card tips to your staff, and enter a Cash Count.
- Perform credit card tip adjustments.
- View your Z Report and perform your closeout procedures.
Only Users with the “Allow users to access POS Management” permission will see the Management Button. Only those people who are responsible for managing cash should have this permission (i.e. Managers and Admins).
Reporting
The Reporting Button launches a screen that displays the Merchant Portal Sales Summary Page. To return to the Home Screen, press the Done Button.
This button will only be shown to users that are allowed access to the Merchant Analytics Reports and the Merchant Portal.
Admin
The Admin Button launches a screen that displays the Merchant Portal Point-of-Sale Dashboard Page. From there, you can use the Navigation Menu to access the Settings to make changes to your location, inventory, stations, groups, and users. To return to the Home Screen, press the Done Button.
Only Users that are allowed access to the Merchant Portal will be able to see and use the Admin Button.
Secondary Buttons
The secondary buttons are located at the top right side of the screen and allow the user to Sync, Lock and Log Out of the App.
Lock Screen
Selecting the Lock Screen Button locks the app and displays the Lock Screen. To re-enter the app after locking the screen, a User must enter their unique PIN number.
The Lock Screen Button is available to all Users.
Log Out
Selecting the Log Out Button logs out the current User from the app. Only Users with the “Allow users to Logout of the POS app” will have access to the Log Out Button.
Sync Now
When selected, the Sync Now button syncs any changes made in the portal to the Vital Select app.
More Button
The More Button is where the additional options like Support and Register Settings can be found. Once you select the More button a pop-up will appear with all available options will appear.
Help
The Help Button launches a screen that displays the online Help Page, where Users can access articles about using the app. To return to the Home Screen, press the Done Button.
The Help Button is available to all Users.
Support
The Support Button launches a screen that displays your Support Page where Users can submit support tickets for assistance. To return to the Home Screen, press the Done Button.
The Support Button is available to all Users.
Register Settings
Selecting the Register Settings Buttons displays the Settings Screen where Users can setup and manage receipt printers, card readers, barcode scanners, and other peripherals. To learn more about the Register Settings Screen, click here.
Only Users that have the “Allow users to edit POS Settings” permission will be able to use the Register Settings Button.