How to Enable the Timeclock
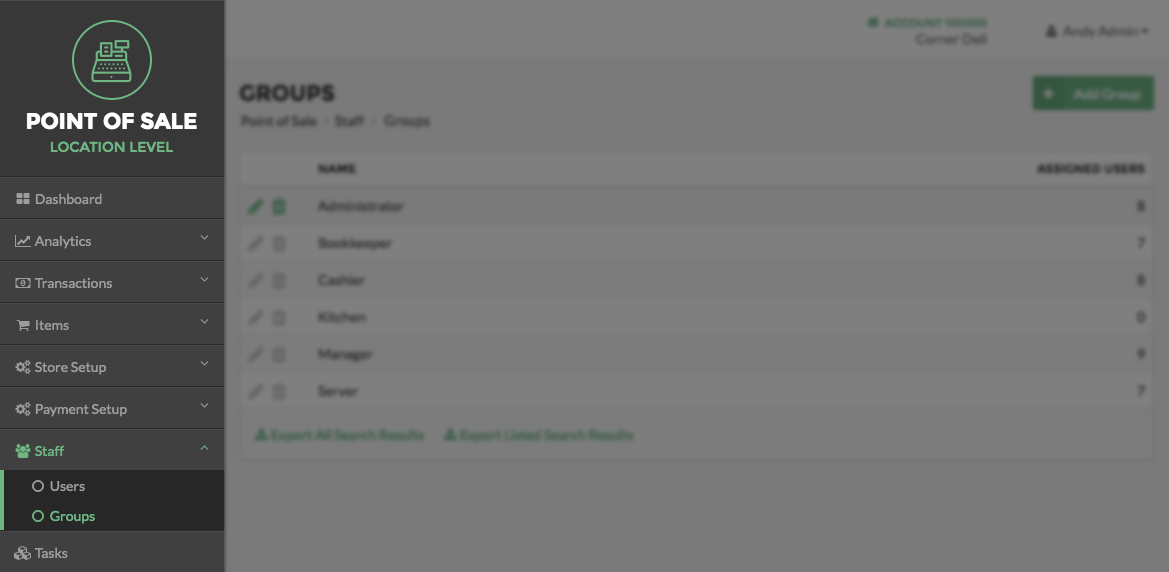
There are three Timeclock permissions that must be set before a User can have access to the Timeclock features in the app. To enable the Timeclock permissions for Users, begin by logging in to the Vital Select Portal. Select Staff on the left side of the Navigation Menu, and then select Groups from the listings.
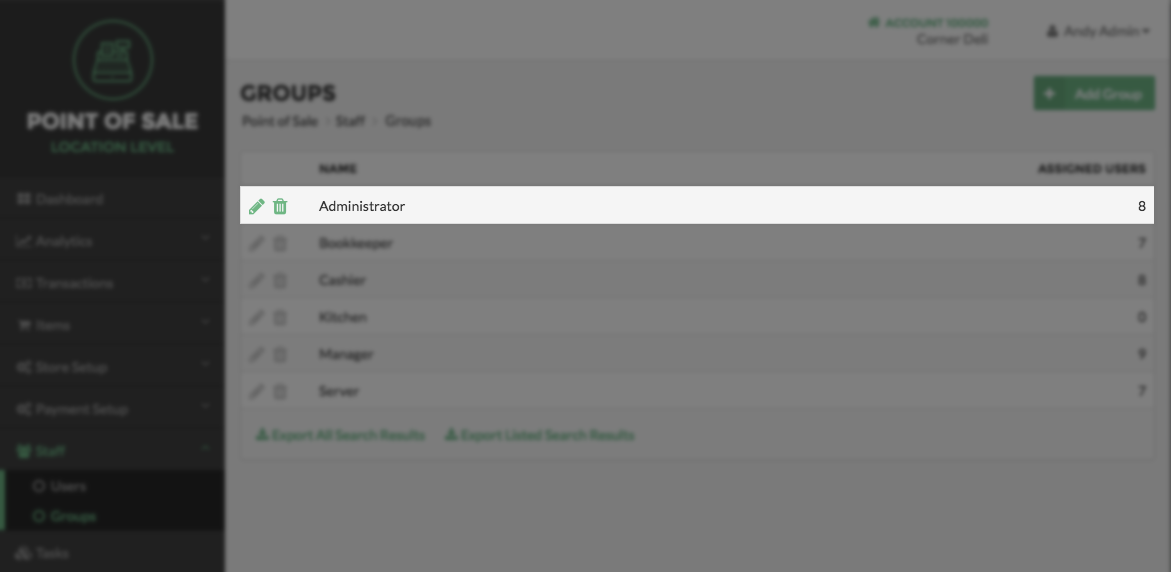
Locate the Group you choose to add the Timeclock Permissions to. Then, select the Edit button, represented by a Pencil Icon located on the left side of the Group name. This will direct you to the Edit Group page.
On the Edit Group screen, scroll down until you see the Permissions header. Under the Permissions header, select the checkboxes next to the Management and Registers sections, to enable them for that Group.
Management
In the Management section select the checkbox next to the 'Allow users to view, add, edit, and delete Timeclock Shifts permission.

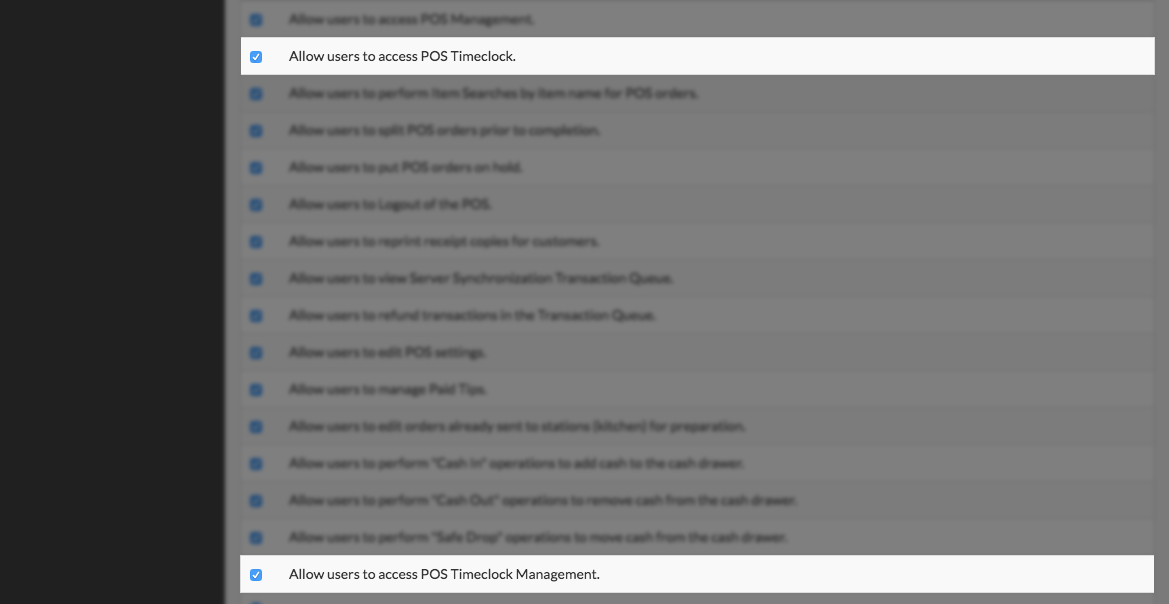
Registers
In the Registers section select the checkboxes next to the 'Allow users to access POS Timeclock' permission.
In the Registers section the 'Allow users to access POS Timeclock Management' permission.
Once finished select the Save button located on the bottom right side of the Permissions section.
Step by Step Summary
- Log into the Portal
- Select Staff on the left side of the Navigation Menu, and then choose Groups from the listings.
- Locate the Group you choose to add the Timeclock Permissions for.
- Select the Edit button, represented by a Pencil Icon, located on the left side of the Group name.
- Select the checkboxes next to the three Timeclock options in the Permissions section
- Select the Save button located on the bottom right side of the Permissions section.