Item Library
The Library Page is designed to give you a full visual display of the inventory of Items and Services for your business. It also makes it easy for you to manage each of your Categories, Subcategories, Groups and Items. The Item Library allows you to Add and Edit your Categories, Subcategories, Groups, and Items. Here, you can even Track the inventory of your Items and also set a price and cost for each Item.
To view your Item Library, select Items in the Navigation Menu, and then choose Item Library from the listings. You will see a table that organizes and displays information about your Items.
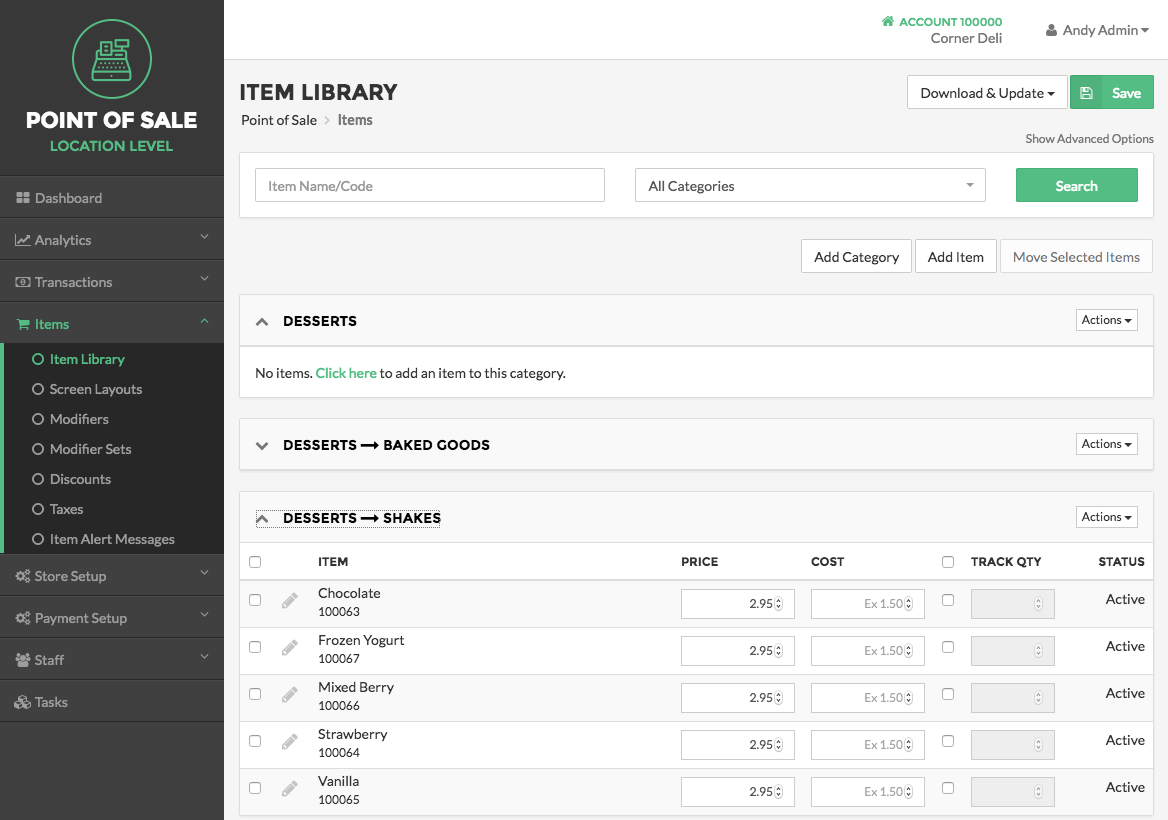
Table Hierarchy
The Item Library is a hierarchy divided into four possible classifications (from most broad to most narrow): Category, Subcategory, Groups, and Items. These classifications should be organized in a way that helps you easily locate a Item.
Categories
Categories, the highest level in the hierarchy, are shown first in the table. Categories are the broadest level of organization, within which you can add multiple Subcategories, Groups, and Items. For example, a category in a Mexican restaurant may be Tacos.
Subcategories
Subcategories are the second level or organization, appearing first when you click the plus sign to expand a Category. Within each Subcategory you can add Groups of Items, or just individual Items. For instance, within the Taco Category, a Mexican restaurant may have a Subcategory of Chicken Tacos.
Groups
Groups can be to a Subcategory. Groups allow you another level of organizing Items within a Subcategory, however they are not always necessary and you can choose to only list individual Items for a Subcategory. In our Mexican restaurant example, you may choose to have Groups of Hard Shell and Soft Shell in the Chicken Tacos Subcategory.
Items
Items can be added directly to any Category, Subcategory, or Group, but to keep things clean and organized, you should separate Items out into the appropriate Category/Subcategory/Group. For example, a Mexican restaurant could add Soft Shell Spicy Chicken Taco to the Taco Category, but it makes more sense to put it in the Soft Shell Group within the Chicken Tacos Subcategory.
Table Elements
Search
You can search for specific Items or Services by using the Search feature in the Item Library. To do this, enter an Item's name or code in the first field, select a category or all categories to search from, and then select the Search button.
Download & Update
The Download & Update button allows you to Download and update physical counts and Items received, Import Items to your Item Library and Export active and inactive records.
Expansion Arrow
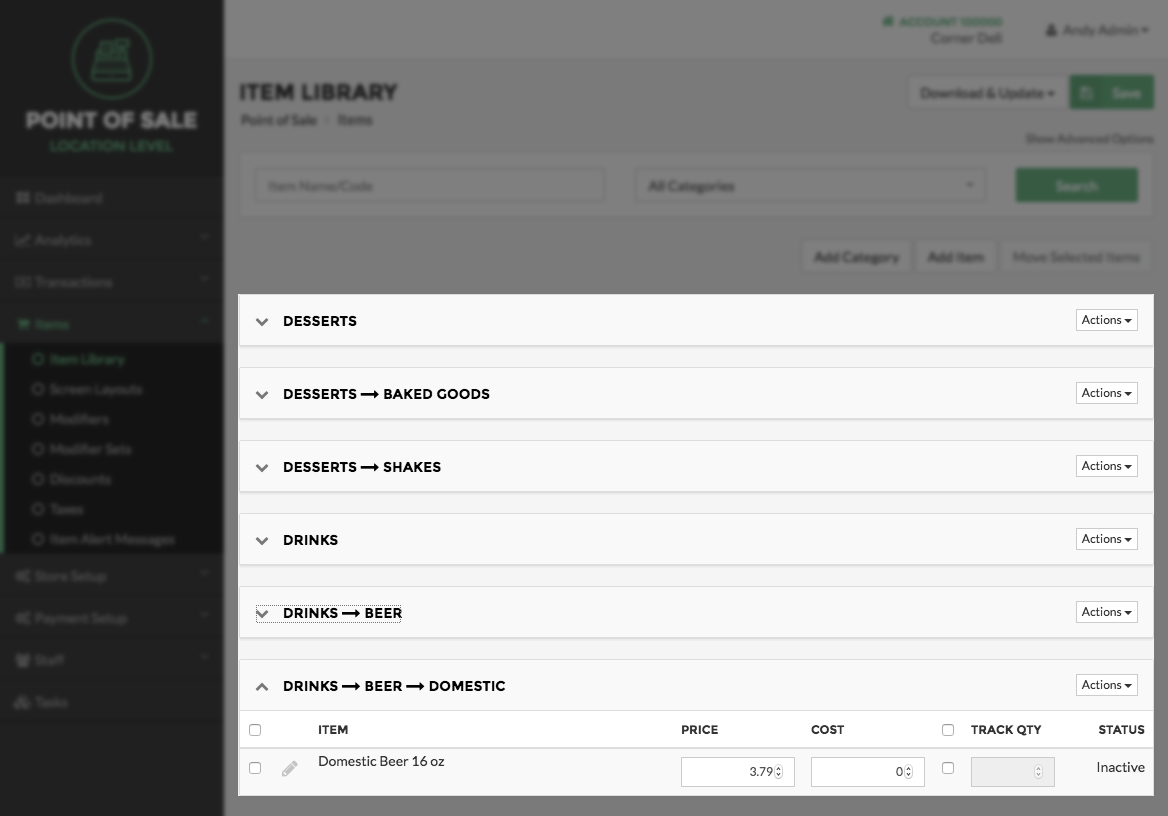
Clicking on the expansion arrow, located on the left side of a Category, Subcategory or Group will expand or collapse the table and anything that is organized within that Category, Subcategory or Group.
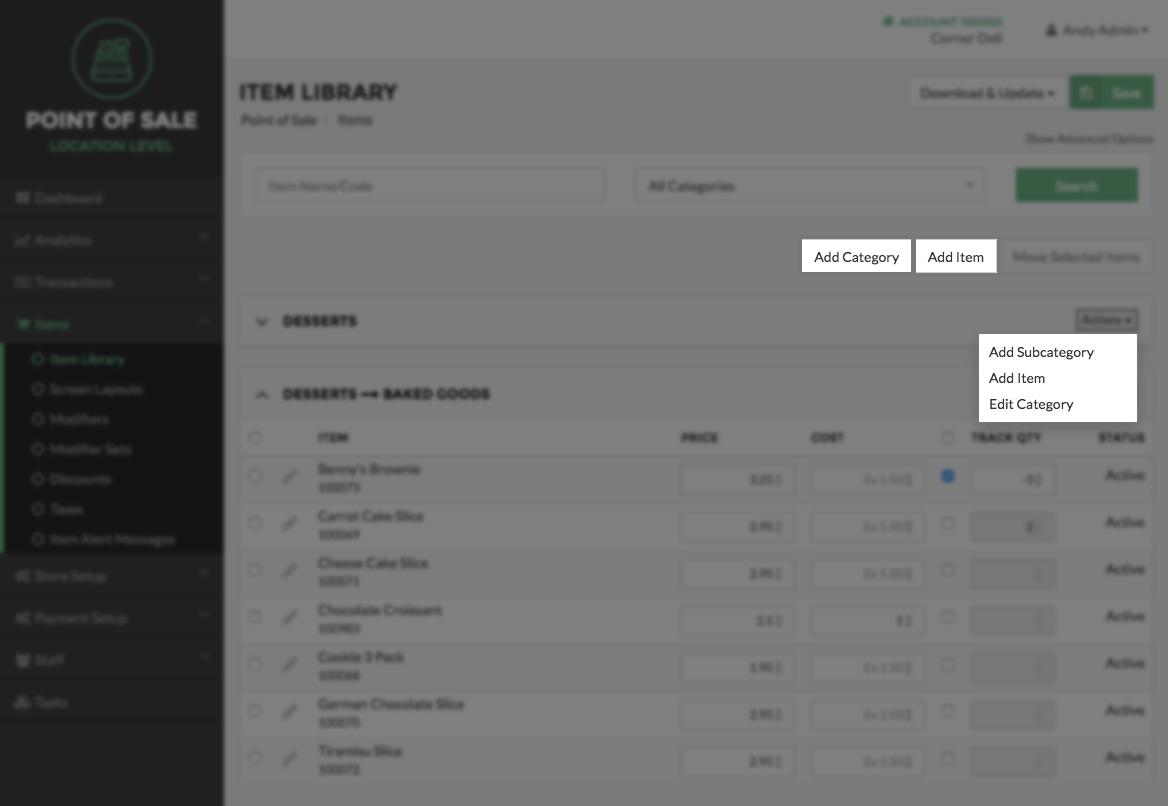
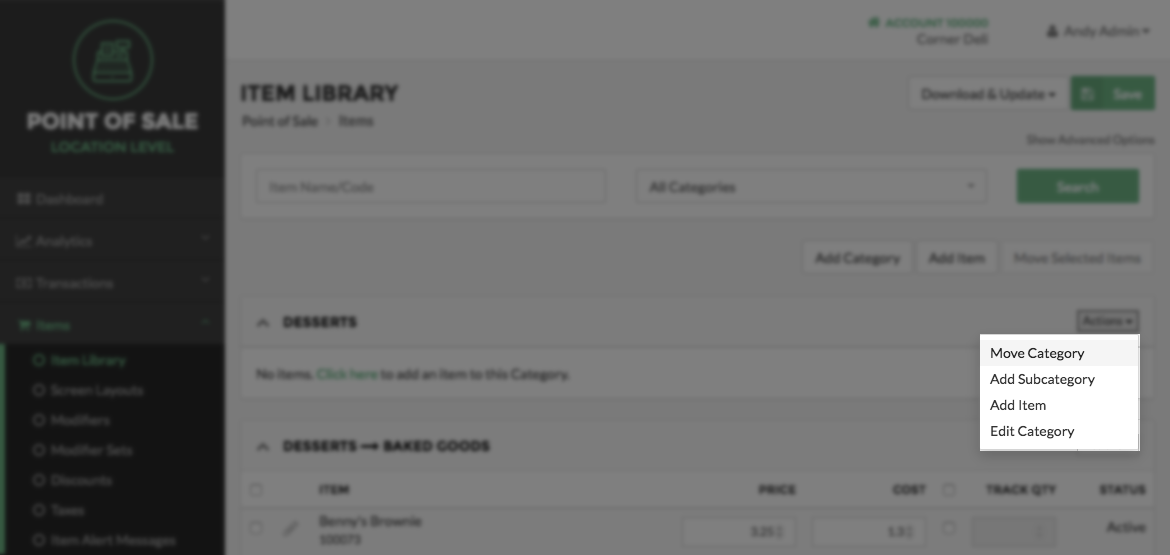
Actions
Selecting the Actions button will allow you to Add and Edit Categories, Subcategories and Groups, by choosing an option from the dropdown menu that appears. Items can also be added from the Actions button, but you must use the Pencil Icon to edit an Item.
Pencil Icon
The Pencil Icon is used to edit an Item. Once selected you will be directed to the Edit Items page, where you can edit the status, name, unit price, unit cost, product code, description, and what Locations the Item is applied to.
Item
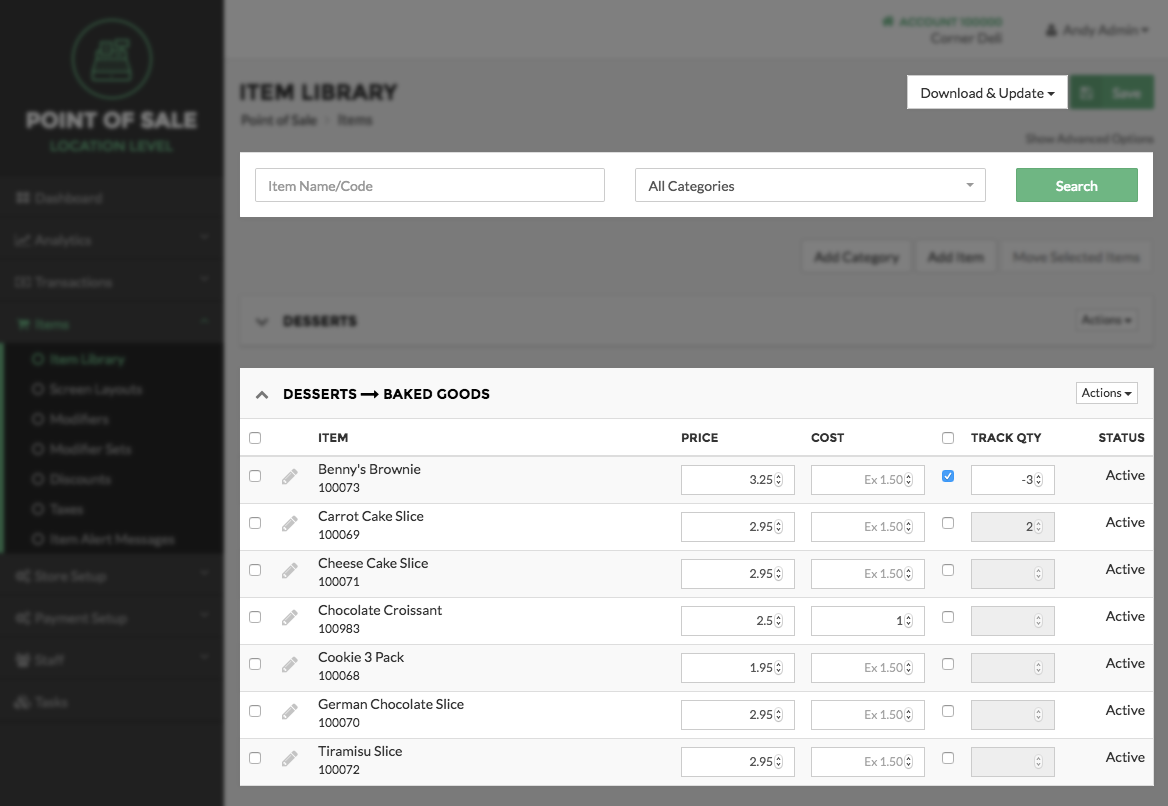
This column in the table lists the name and code you assigned for each Category, Subcategory, Group or Item.
Cost
When you get down to the Item level of the table, this column will be filled in with the assigned cost of each Item.
Price
When you get down to the Item level of the table, this column will be filled in with the assigned price of each Item.
Status
The Status column displays whether or not the Category, Subcategory, Group or Item is currently being utilized by your business. Those that say Active in the column are Active Items, and those that are Inactive will say Inactive in the column.
Add Category, Subcategory, Group, or Item
Add Category
The Add Category button will direct you to the Add Category page. On the Add Category screen you can create a new Category by entering a Name, Color, Icon and adding it to your Item Library.
Add Subcategory
The Add Subcategory option, located under the Actions dropdown menu, will direct you to the Add Subcategory page. On the Add Subcategory screen you can create a new Subcategory by entering a Name, Color, Icon and adding it to your Item Library. Adding a Subcategory can only be done from the Category level.
Add Group
The Add Group option, located under the Actions dropdown menu, will direct you to the Add Group page. On the Add Group screen you can create a new Group by entering a Name, Color, Icon and adding it to your Item Library. Adding a Group can only be done from the Subcategory level.
Add Item
The Add Item option is fond in two places on the Item Library page. The first place is the Add Item button located at the top of the Item Library screen. The second way it to choose the Add Item option from the Actions dropdown menu. Once you have selected one of these options you will be directed to the Add Item screen to continue the Add Item process.
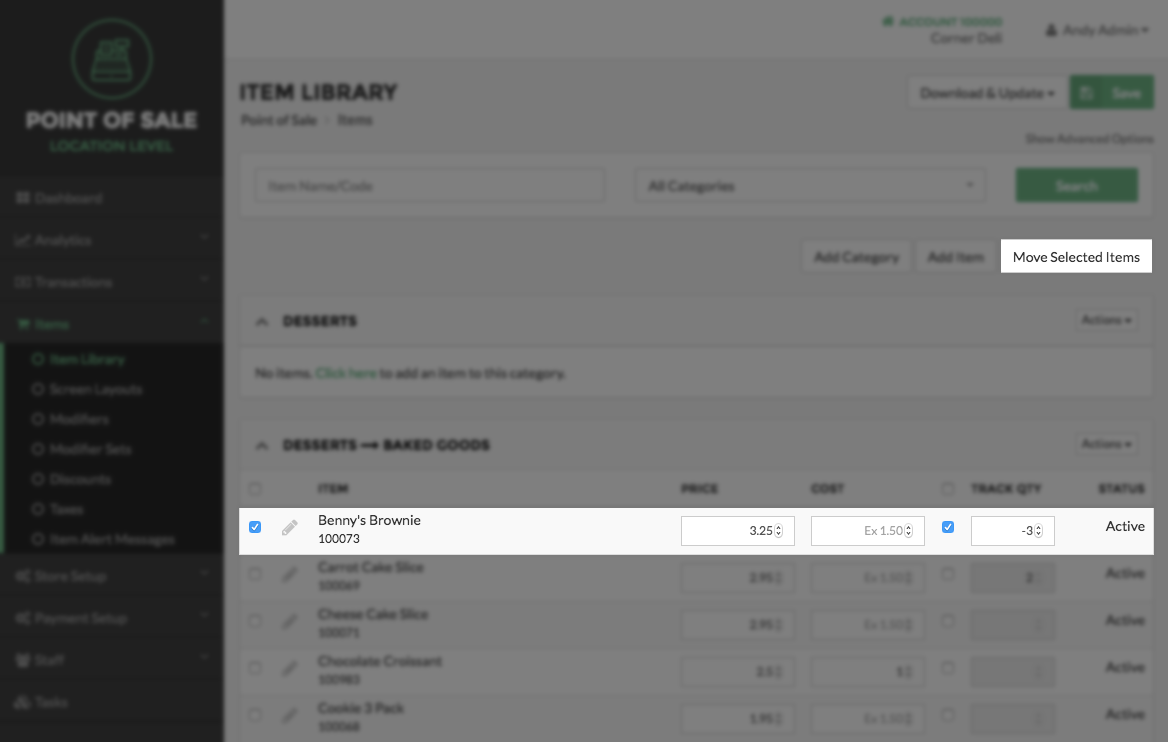
Move Selected Items
The Move Selected Items button allows you to move Items from one Category, Subcategory or Group to another Category, Subcategory or Group. To move an Item or Items select the checkbox located on the left side of the Item name, and then click the Move Selected Items button. A pop-up will appear with a table hierarchy chart. Select the arrow next to the Category, Subcategory or Group you choose to move the Item into that Category, Subcategory or Group.
Move Categories, Subcategories or Groups
The Move Category button allows you to move one Category, Subcategory or Group to another Category, Subcategory or Group. To move Categories, Subcategories or Groups using the Merchant Portal, on the Item Library screen, locate the Category, Subcategory or Group you wish to move. Next, select the Actions dropdown arrow to the right side of the Category, Subcategory or Group and select Move. This will cause a pop-up to appear that will allow you to move the relevant Category, Subcategory or Group.
The pop-up will list the positions that the chosen Category, Subcategory or Group may be moved to. Once you have chosen where you want to place the Category, Subcategory or Group select the Move button at the bottom right of the pop-up.
Note:
Make sure to keep your Item Library as simple and logical for your business as you can. Also, remember to Sync Vital Select after changes are made, to ensure your changes are reflected on the point-of-sale.
Related Tasks
How to Add a Subcategory or Group
How to Delete Categories, Subcategories, or Groups
How to Deactivate or Reactivate a Category Subcategory Group or Item
How to Edit a Category Subcategory or Group
How to Move Categories, Subcategories or Groups
How to Edit Items for a Location
How to Automatically Create Item Screens From the Item Library
How to Manually Arrange Item Screens and Items
How to Move an Item or Multiple Items