How to Apply a Modifier to an Item
Apply a Modifier to an Item from the Receipt Viewer
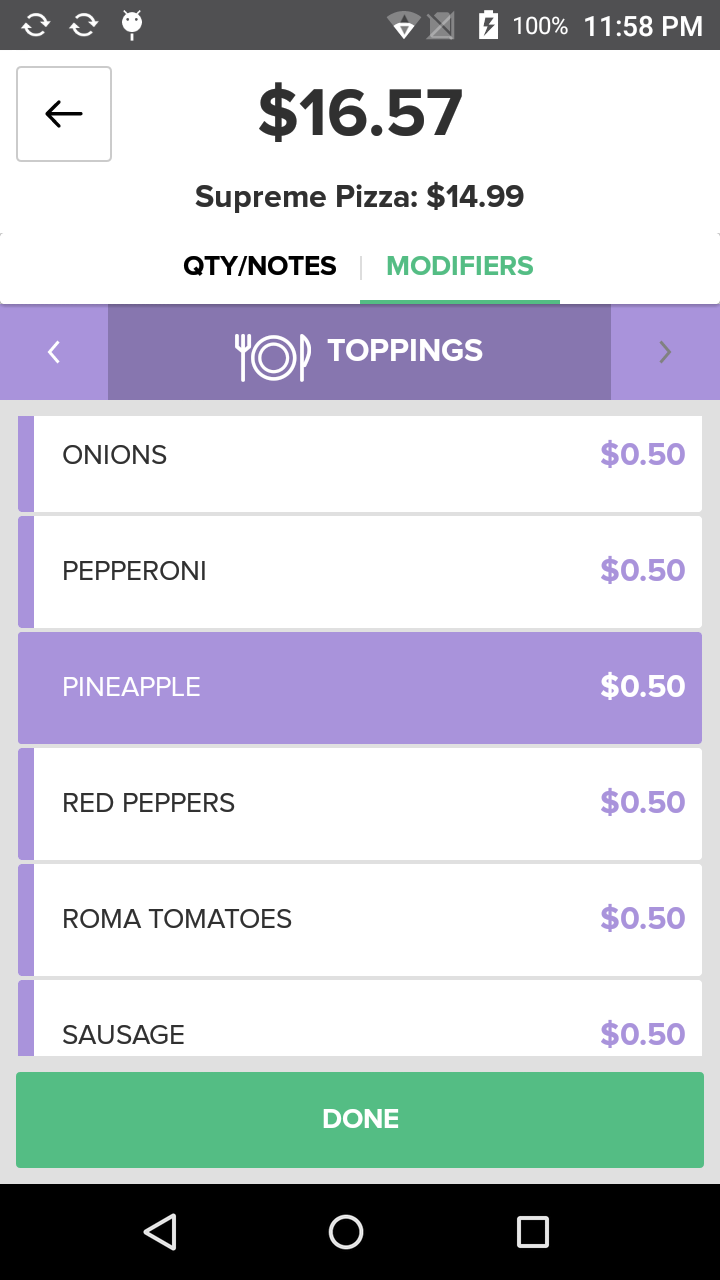
Once you have selected an Item for an Order, if Modifiers have previously been enabled for that particular Item in the Portal, you may add Modifiers to that Item. Once the Item is added to the Order, tap on the Cart Viewer, and then tap the Item. The Edit Item Screen will appear in the center of the screen. Select the Modifiers Tab. The Modifier Sets that were assigned to that Item will be listed in Navigation Ribbon at the top of the screen. Select the appropriate Modifier Set, and then tap the Modifier Button in the center of the screen to apply that Modifier to the Item. The Modifier Button will change color to show that it has been applied, and you will see the Modifier listed under the Item in the Receipt Viewer. Tap the Done Button when finished.
Step by Step Summary
- Make sure Modifiers are enabled for the Item in the Portal. For information on creating, editing, and assigning Modifiers, click here.
- Tap the Item you want to modify in the CartViewer. The Edit Item Screen will appear in the center of the screen.
- Select the Modifiers Tab.
- Select the appropriate Modifier Set from the left column, and then tap the Modifier Button in the center of the screen to apply that Modifier to the Item.
- The Modifier Button will change color to show that it has been applied, and you will see the Modifier listed under the Item in the Receipt Viewer.
- Tap the Done Button when finished.
Apply a Required Modifier to an Item
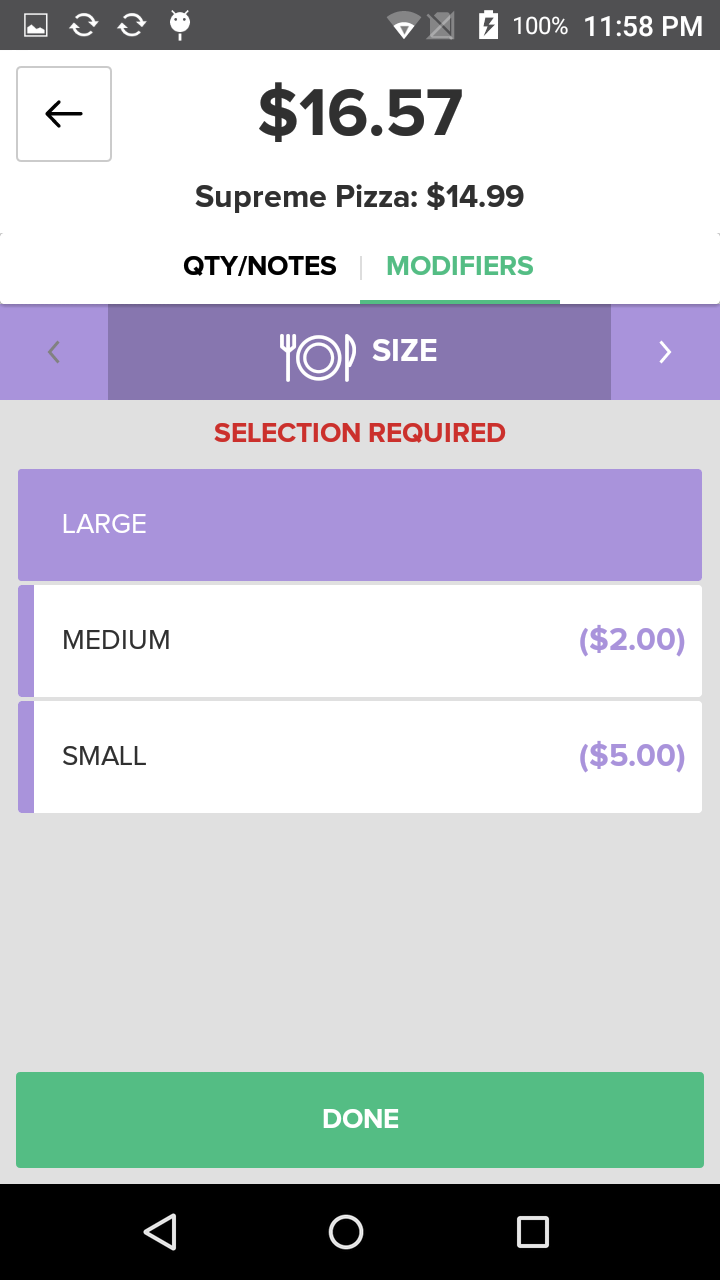
Some Items may have Required Modifiers assigned to them. When you add an Item to an Order that has Required Modifiers, as soon as you tap the Item to add it to the Order, the Edit Item Screen will fill the center of the screen. The Modifier Tab will be preselected, as will the Required Modifier Set that includes the group of Modifiers from which you must choose a Modifier for the Item. If there is more than one Required Modifier for that Item, the Modifier Set Button(s) with the Required Modifier(s) in it will have a flag on it to indicate you must tap it and select a Modifier from that Set.
For more information about how to assign Modifier Sets to Items, click here.
Step by Step Summary
- Assign a Required Modifier Set to an Item in the Portal.
- Add an Item with a Required Modifier to an Order, the Edit Item Screen will automatically fill the center of the screen.
- Select a Modifier from the preselected Modifier Set.
- If there is more than one Required Modifier for that Item, the Modifier Set Button(s) with the Required Modifier(s) in it will have a flag on it to indicate you must tap it and select a Modifier from that Set.
- Continue until all Required Modifiers have been added to the Item.
- Tap the Done Button when finished.