Discounts
The Discounts Page can be found under Items in the Navigation Menu. The Discounts Page allows you to Add and Edit Discounts as needed. Discounts can be added by amount or by rate, meaning that a Discount can either offer a dollar amount discounted from a transaction (Ex: $4 off), or a percentage (Ex: 15% off).
Discounts can also be added at the Item level or as a Bundle. An Item Discount will discount an Item to a chosen dollar off or percent off amount of your choosing, when added to an order. The Bundle Discount feature allows multiple Items to be discounted as a group rather than individually and requires at least 2 or more Items be selected before a discount will become available as an option to be applied on an order.
Viewing Discounts
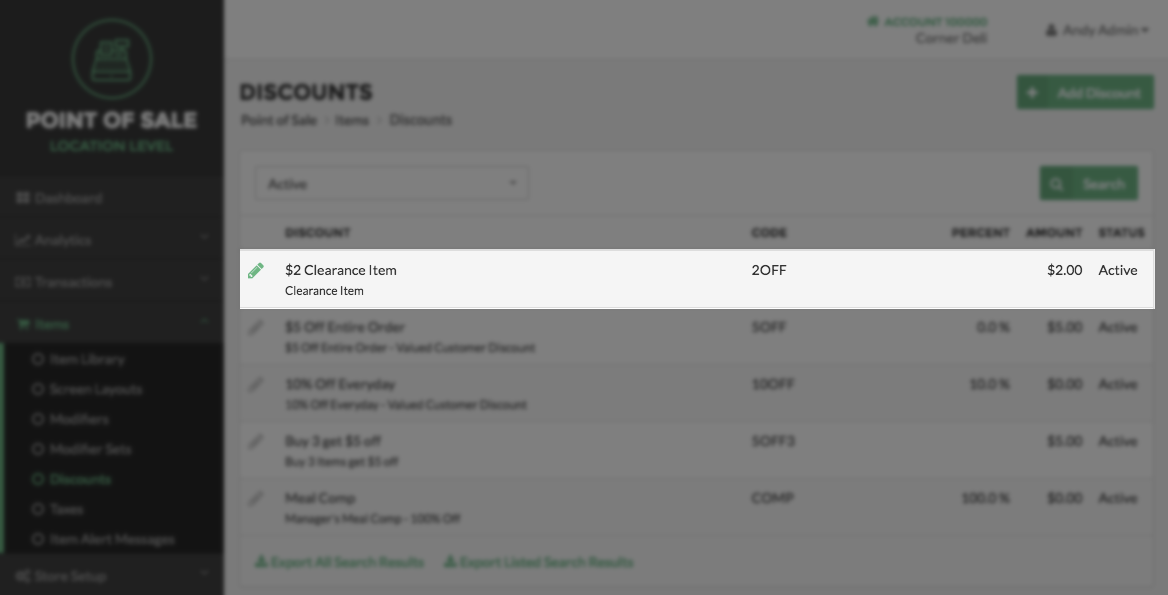
After you have added a Discount, it is displayed within the Discounts Table. The Discount Table displays the Discount Name, Description, Discount Code, Percent or Amount of the Discount, and the Discount Status. To sort the table by Percentage, Amount, or Status, click the corresponding column name at the top of the table. To return the column to its previous order, click the column name again.
You can also sort Discounts by Status by selecting the field titled All Discounts located to the top left of the table. A drop down menu will appear and you may select to sort by Active or Inactive.
To export a list of all Discounts select Export All Records at the bottom of the table; or export only those Discounts appearing after a search by selecting Export Current Results.

Enter Discount at Time of Use
On both the Add and Edit Discount pages there is an option that says "Enter discount amount at time of use". This option allows the user to manually enter the price of a discount when the discount is applied to the order. If you select the checkbox next to this option, the discount type, discount value, and discount amount are grayed out and become irrelevant. This is because the manual entered discount will always be applied to the entire order.
Discount Types
The field entitled "This Discount Applies To", specifies which set of options appear for each individual type of discount. Depending on your needs, there are three options to choose from:
Entire Order:
This Discount will be applied to the total price of an order. Once you have chosen this option, select whether this Discount will be a dollar off or a percentage off amount the entire purchase total of an order. Then input the amount or percentage in the corresponding field. Select Save to advance to the Edit Discount Screen. From this screen you will choose which Users are able to access this Discount.

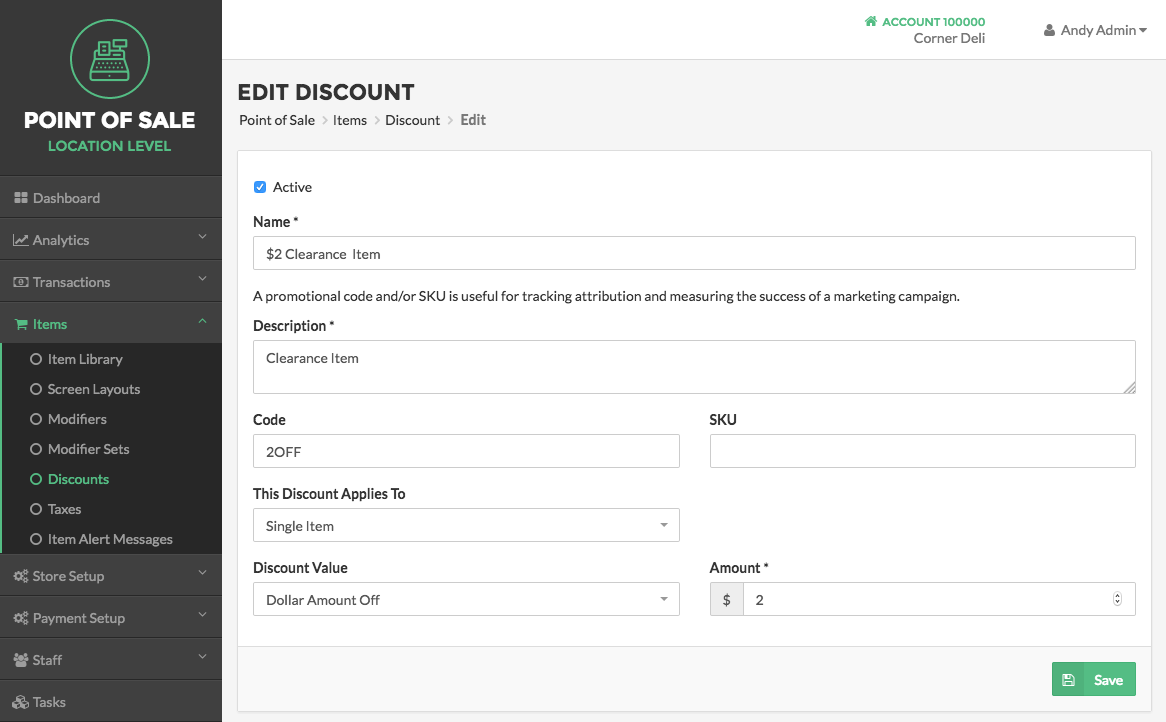
Single Item:
This Discount will be applied to one or more Items individual on an order. Once you have chosen this option, select whether this Discount will be applied as a dollar off or a percentage off amount. Then input the amount or percentage in the corresponding field. Select Save to advance to the Edit Discount Screen. From this screen you will choose what Items are attached to this Discount and which Users are able to access this Discount.
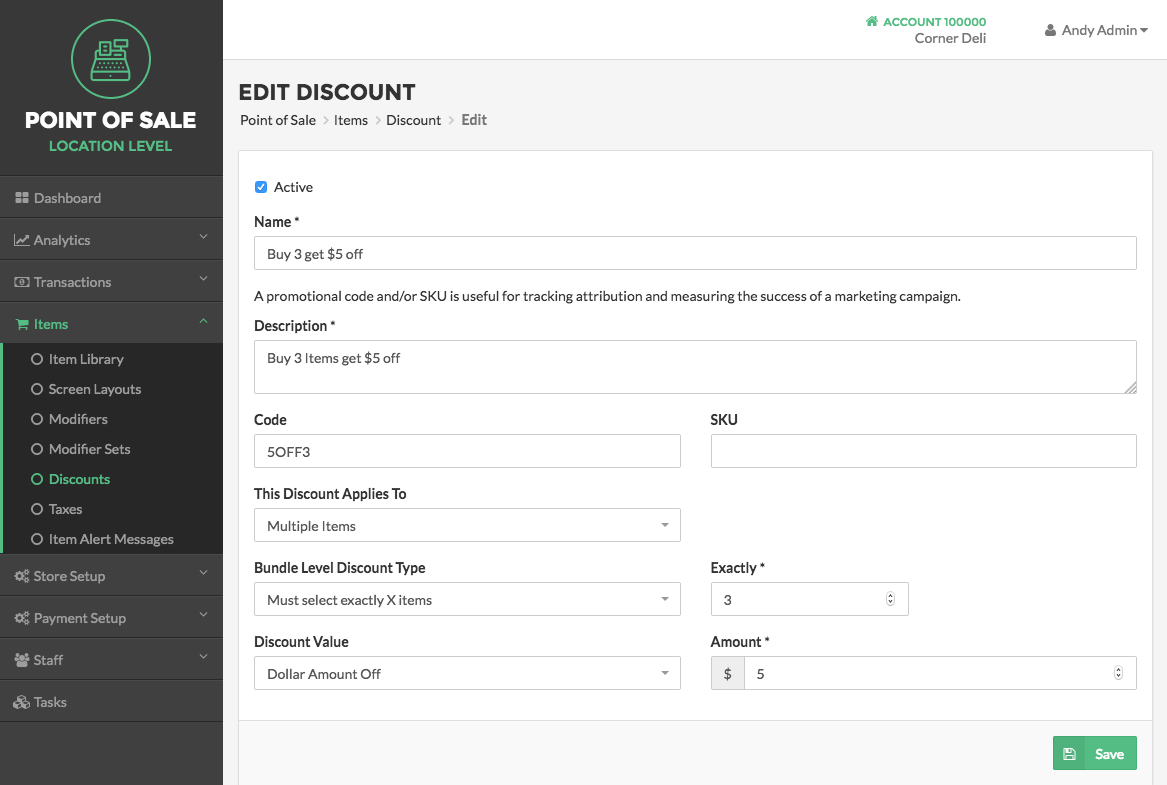
Multiple Items:
This Discount will be applied to a set number of Items from an order. Multiple Item Discounts require that a Bundle Level Discount Type must be selected. This means you must choose if the Multiple Item Discount is set for a specific number of Items (Ex. 2)or a specific range of Items (Ex. min of 2 - max of 5). You must also choose a Discount Value. The Discount Value on a Multiple Item Discount can be one of 4 options:
- Dollar Amount Off: The total dollar amount that has been set will be deducted from the Items total amount.
- Percentage Off: The percentage amount that has been set will be deducted from Items total amount.
- Total Price After Discount: The Items will be discounted to reflect a specific total for the Items selected.
- Item Price After Discount: The Items will be discounted individually to the set amount.
Adding Discounts
Adding a Discount is a two-step process.
First, create a Discount by clicking the Add Discount Button located at the top right of the page, you will need to supply information about the Discount. Provide a unique name for your Discount, enter a description for the Discount, and enter a Code or SKU for the Discount (optional).
Next, specify whether the Discount will be added to: Entire Order, Single Item, or Multiple Items.
Last, choose whether the Discount will be a dollar or percentage off amount. The dollar off amount means that a set dollar amount will be discounted from the Item(s) or order. The percentage off amount means that a set percentage will be discounted from the Item(s) or order.

Select whether or not the Discount will be Active or Inactive by checking or unchecking the Active checkbox. This is known as the Discount’s Status. Some merchants offer seasonal Discounts with no need to be displayed year-round: for instance, a diner may only offer its “Red, White, and Blue Special” for 50% off apple pie during the month of July – so the Discount may only be Active for a limited time.
Adding a Code or SKU for a Discount can help track the success of advertising and marketing campaigns. Reviewing Discounts based on Code or SKU at a later date may help you sort through data and make informed business decisions. Click Save when finished.
Note
Each of the preferences you indicate while creating the Discount can always be edited at a later time by Editing the Discount.
By pressing Save you will be taken to the Edit Discount Page to complete the second step of the Add Discount Process.
Editing Discounts
Editing Discounts allows you to specify the Locations where the Discount may be used, the Users who will have access to the Discount when using the point-of-sale, and the Items that will be associated with the Discount. Click Save when finished editing the Discount.

Note:
After you have added a Discount, it will displayed in the Discount Table. Selecting the Pencil Icon to the left of a Discount will direct you back to the Edit Discount screen to make any additional changes necessary.