How to Set Discounts for a Location
The Back Office provides a quick and easy way for you to control the selection of Discounts that are available at a particular Location.
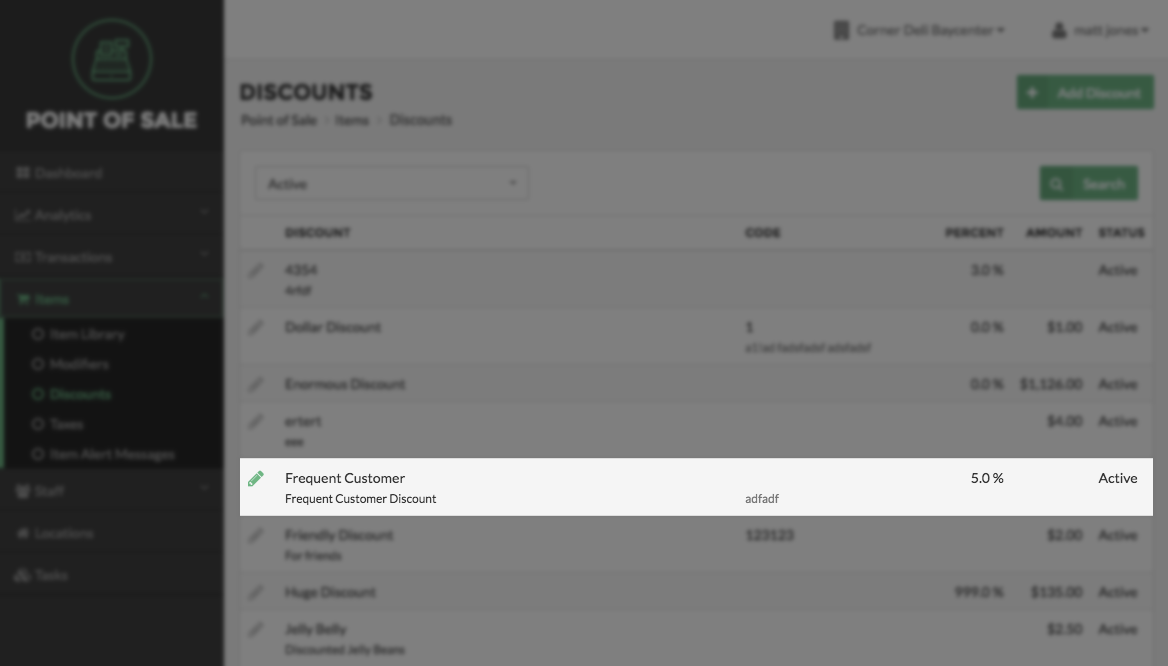
To change the Discounts that are available at a specific Location, begin by selecting Items on the left side of the Navigation Menu, and then choose Discounts under the listings.On the Discounts page, select the Edit button, represented by a Pencil Icon on the left side of the Discount that you choose to set for the location. This will direct you to the Edit Discount page.
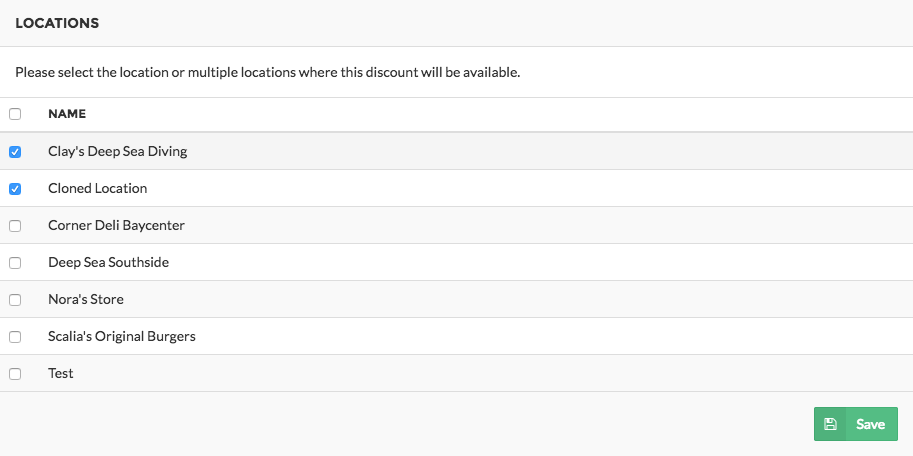
On the Edit Discount page, under the Locations, select the checkbox on the left side of the location name to make it available. To make a Discount unavailable, simply deselect the checkbox.
When you are finished selecting the Discounts you want to be available at a particular Location, click the Save button at the bottom right of the field. Your Discount selection will be reflected in Vital Select the next time it Syncs.
Quick Summary
- Select Items on the left side of the Navigation Menu, and then choose Discounts from the listings.
- On the Discounts Page, select which Discounts you choose to edit by clicking the pencil icon on the left side of the discounts name.
- Under the Locations field, select or deselect the checkbox to the left of the location name to make the discount available or unavailable for the location.
- Click the Save button when finished making your Discount selections.