How to Customize Receipts
To customize a receipt begin by selecting Store Setup on the left side of the Navigation Menu, and then choose Receipts under the listings. The Receipt contains four elements: the Logo, the Header, Contact Info, and the Footer. Each of these elements can be disabled or enabled by clicking the checkbox next to each element.
Note
Receipt settings can be edited on a per-Location basis, if your business has multiple Locations. Click the Location Drop Down Menu in the upper right hand portion of the screen to select a Location. Clicking Save after making your edits will update the settings for that particular Location.
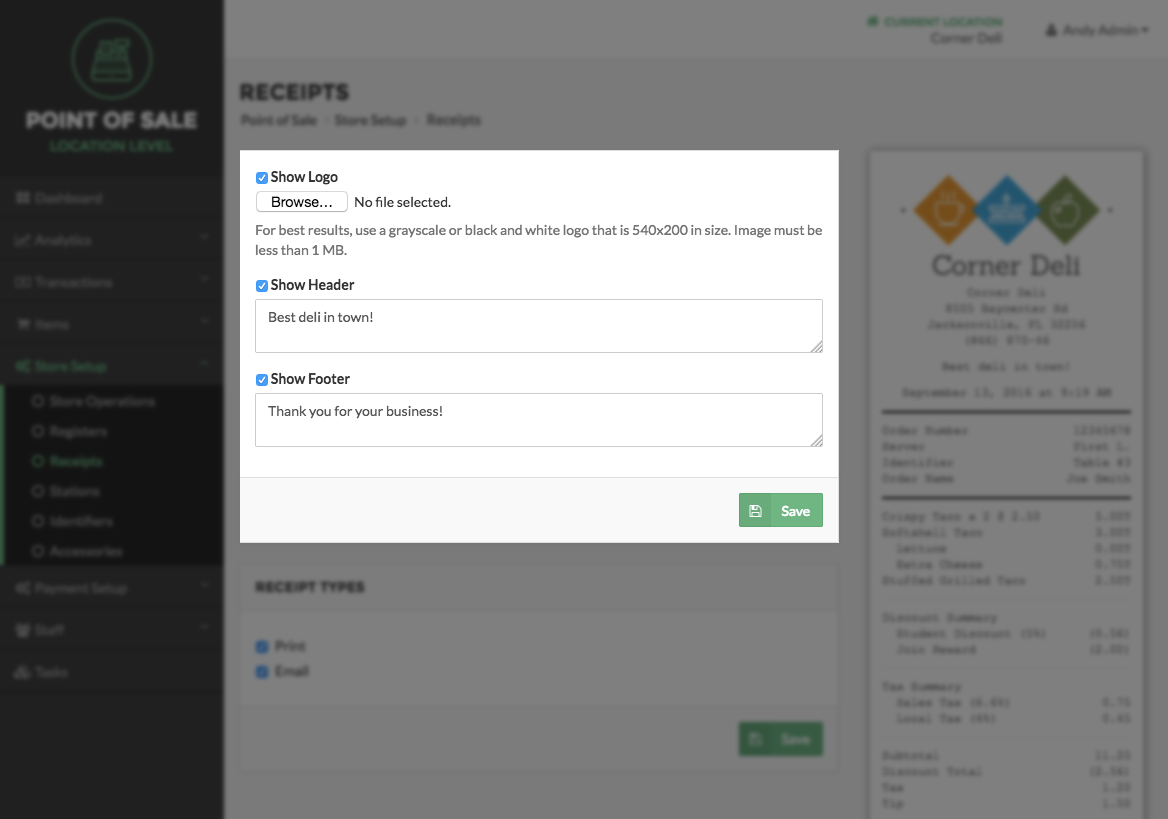
Logo
In the top panel, Logos can be added to receipts for visual appeal by selecting the Choose File Button under the Show Logo checkbox.
Header
Headers are added underneath the Logo, and merchants often use them for slogans or taglines.
Contact Info
Contact Info is displayed towards the bottom of the Receipt and can be useful for customers seeking to return to your business, or direct inquiries about past purchases or visits.
Footer
The Footer is displayed at the very bottom of the Receipt, under the Contact Info, and may be used to say any number of things. Most merchants include text regarding the customer’s commitment to pay the amount listed on the Receipt according to a card issuer agreement.
After you are done making changes to your Receipt, click the Save Button in the top panel.
Receipt Types
The second panel on the Receipts Page allows you to choose what type of Receipts you offer at each Location. To allow Print Receipts, check the box next to Print in the panel. To allow Email Receipts, check the box next to Email. To save any changes made, click the Save Button at the bottom of the panel.

Note:
You can preview what the receipt will look like using the Receipt Viewer located on the right side of the Receipts screen.
Step by Step Summary
- Select Store Setup on the left side of the Navigation Menu, and then choose Receipts under the listings
- Choose the Logo image and enter the Header Footer information
- Edit Receipt Type
- View changes from the Receipt Viewer on the right side of the screen
- Select Save button for each section