How to Add Registers
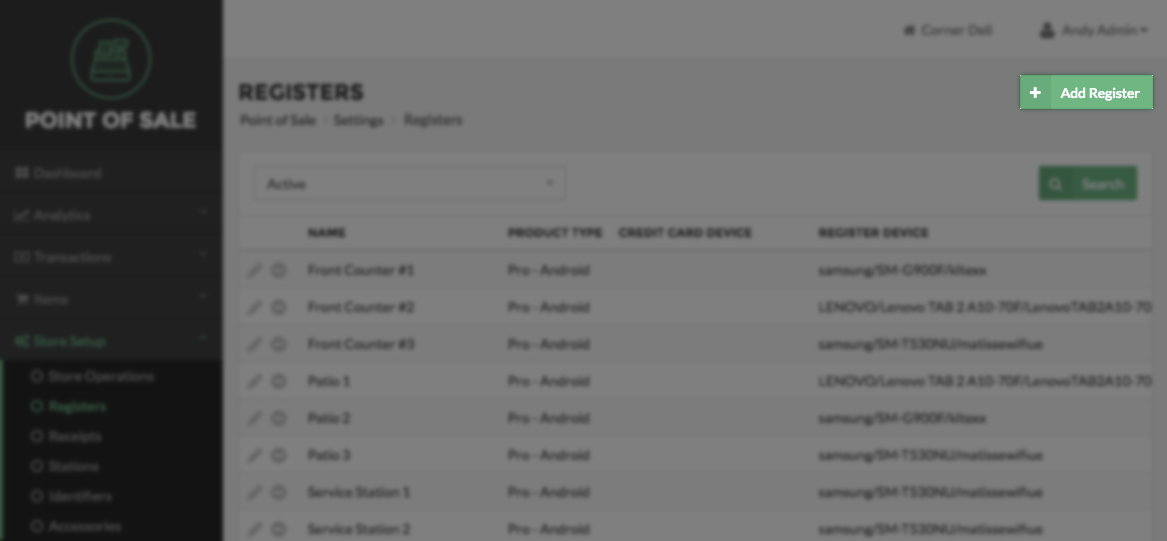
To Add a Register, begin by selecting Store Setup on the left side of the Navigation Menu, and then choose Registers under that listings. On the Registers Page ,select the Add Register Button located at the top right side of the screen to direct you to the Add Register page.
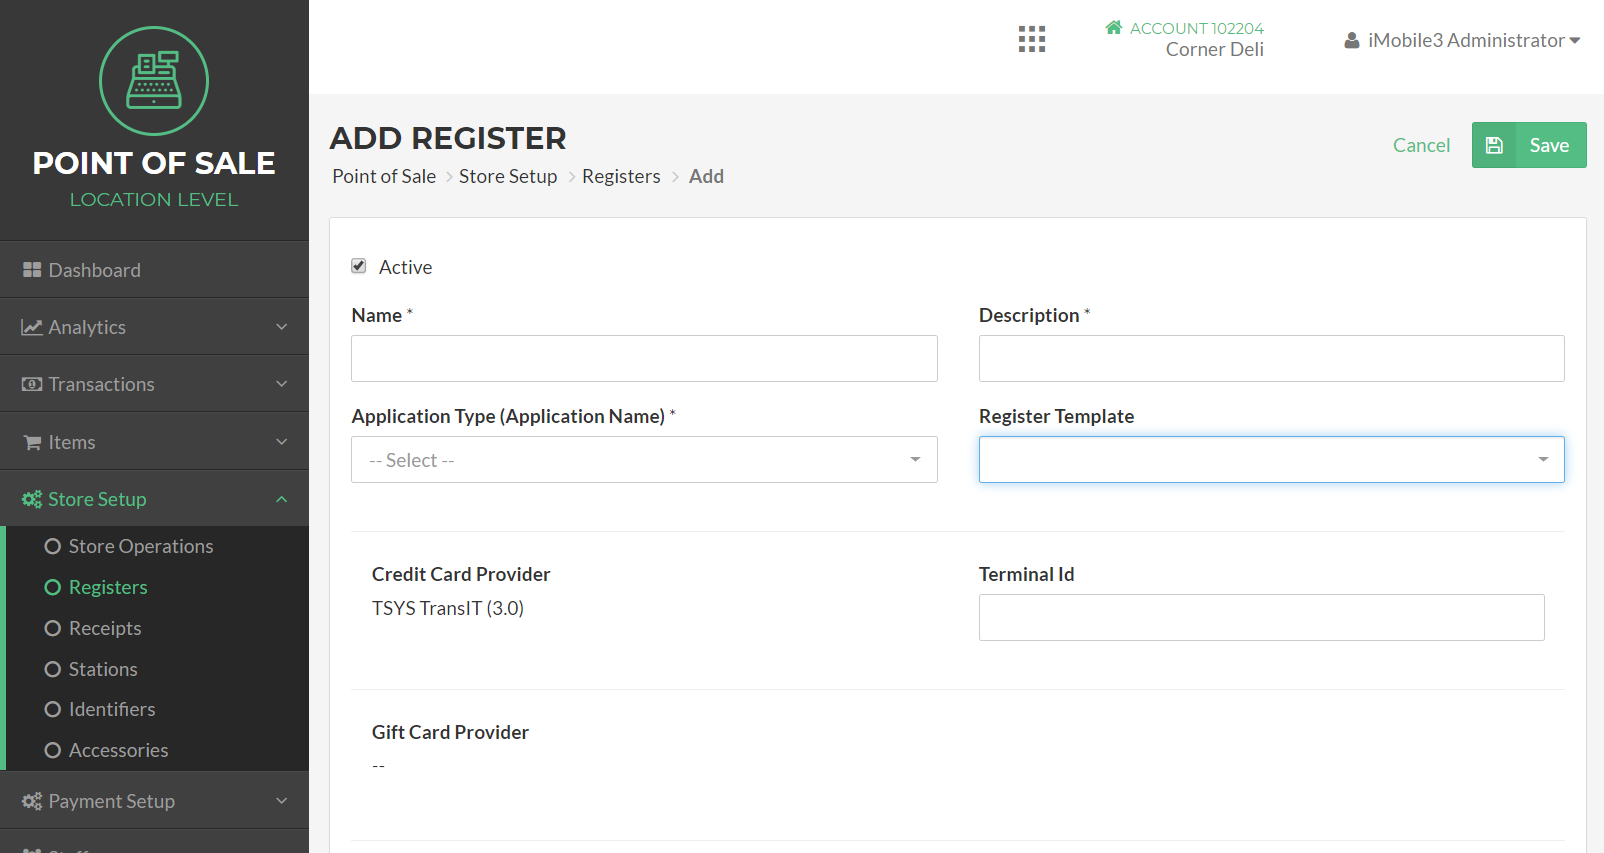
On the Add Register Page, enter the Name, Description and Item Type, Gateway Terminal ID and the Gift Terminal ID.
Register Details
Status – A Register can either be Active or Inactive. When a Register is Active, it is available for normal use. When a Register’s status is set to Inactive, Users will not be able to log in to Vital Select using that Register.
Name – The name you enter here will be used to identify the Register. For example, in transaction listings, each transaction will have a field noting the Register that was used for the transaction. This name will reflect what you enter here.
Description – This description will be used as an additional way for you to differentiate one register from another.
Application Type – This is where you select the Vital Select application type for the register.
Register Template – Select a Register Template for the register being used. The template configures some register settings upon login of the register.
Terminal ID – Enter the Gateway Terminal ID that was issued for you to use.
Item Type – Select the Item Type that will be associated with this Register. Item type refers to the version of the Vital Select app that will be used by this Register. The differences between Vital Select product types may include the availability of features and support for hardware like printers.
When you have completed entering Register details, click Save to add the new Register. If you wish to cancel without adding the Register, click Cancel.
Quick Summary
- Click on Store Setup on the left side of the Navigation Menu, and then select Registers from the listings.
- On the Registers Page, select the Add Register Button.
- On the Add Register Page enter the requested Register details and set the Register Status.
- Click Save, when finished entering Register details.
Concept Information
Related Tasks