How to Move Categories, Subcategories or Groups
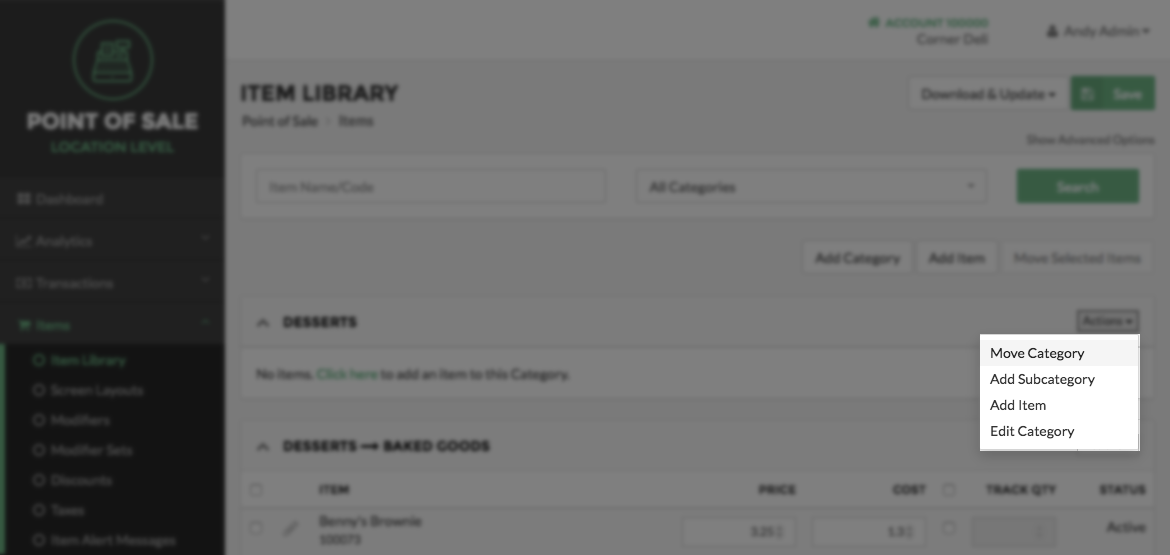
To move Categories, Subcategories or Groups using the Merchant Portal, first click Items in the Navigation Menu on left side of the screen, then click Item Library under the Item listing. From the Item Library screen, locate the Category, Subcategory or Group you wish to move. Next, select the Actions dropdown arrow to the right side of the Category, Subcategory or Group and select Move. This will cause a pop-up to appear that will allow you to move the relevant Category, Subcategory or Group.
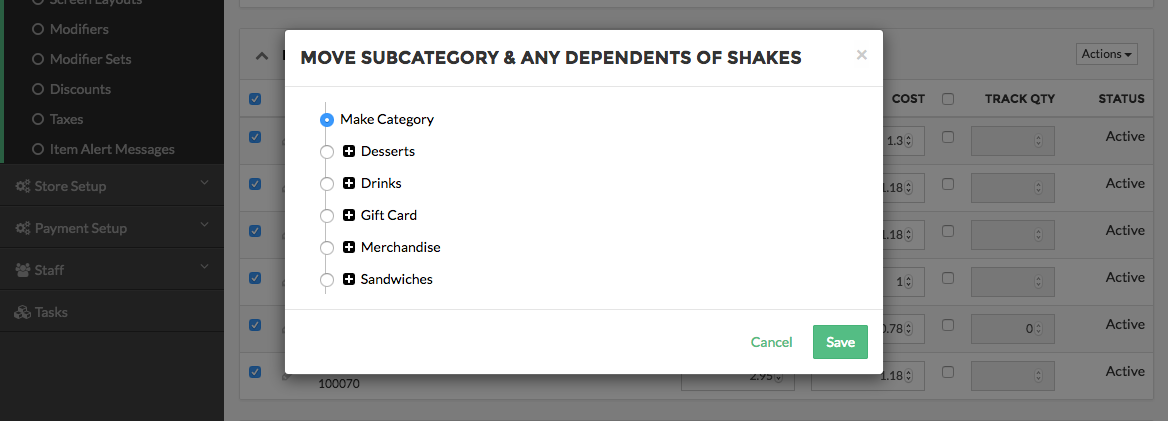
The pop-up will list the positions that the chosen Category, Subcategory or Group may be moved to. To move a Category, Subcategory or Group to a Category, select the Category from the list. To move the chosen Category, Subcategory or Group into another Subcategory or Group, click the plus sign next to the Category name to expand the listing of Subcategories or Groups listed under that Category. Then select the Subcategory or Group from the list to move the Category into. Once you have chosen where you want to place the Category, Subcategory or Group select the Move button at the bottom right of the pop-up.
Note:
To cancel this process at any time, click the Cancel button at the bottom right of the Move Category or Group pop-up to return to the Item Library screen.
Make Category
You may also move a Subcategory or Group to the category level by selecting Make Category in the pop-up.
Step by Step Summary
- Select Items in the Navigation Menu then select Item Library.
- Locate the Category, Subcategory or Group you wish to move.
- Click the Actions dropdown arrow to the right of the Category, Subcategory or Group and select Move.
- Choose a Category, Subcategory, Group or the Make Category option in the pop-up.
- Click the Move button at the bottom right of the Move Category, Subcategory or Group pop-up.
Concept Information
Related Tasks
How to Add a Subcategory or Group
How to Delete Categories, Subcategories, or Groups
How to Deactivate or Reactivate a Category Subcategory Group or Item
How to Edit a Category Subcategory or Group
How to Edit Items for a Location
How to Automatically Create Item Screens From the Item Library
How to Manually Arrange Item Screens and Items
How to Move an Item or Multiple Items