How to Add an Item Alert Message
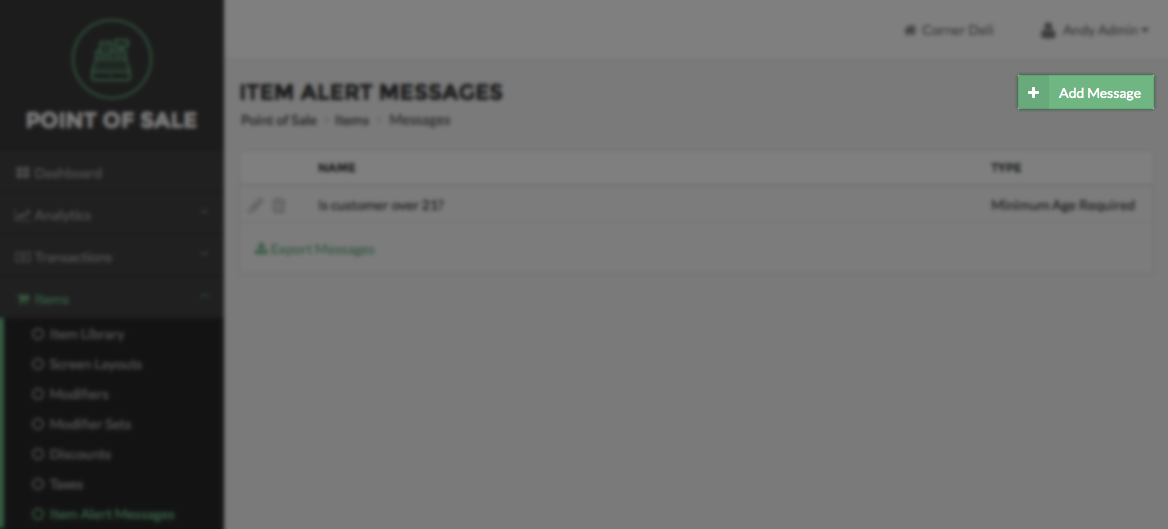
An Item Alert message can be added to an Item to ensure the proper requirements are met before the Item can be sold. To add an Alert Message start by selecting Items on the left side of the Navigation Menu, and then choose Item Alert Messages under the listings. On the Item Alert Messages page select Add Message on the top right side of the screen; this will direct you to the Add Message page.
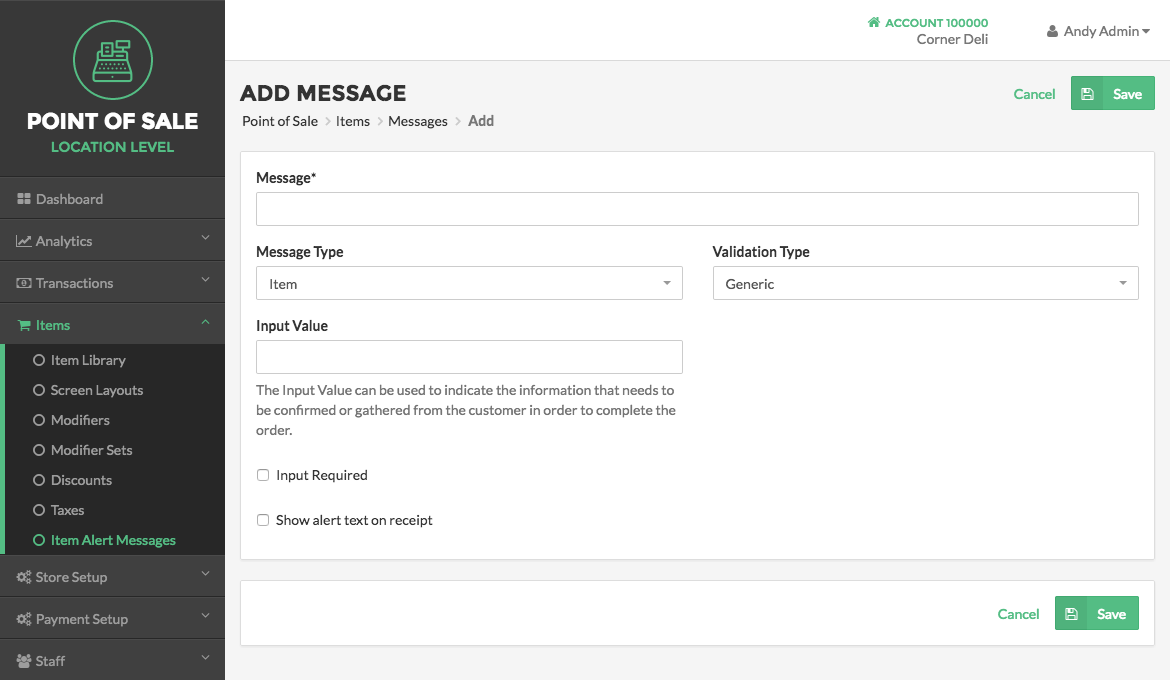
On the Add Message page enter the message you choose to be displayed by entering the information in the Message field. Next click the arrow on the right side of the Message Type field and select an option from the dropdown menu. Then click the arrow to the right side of the Validation Type field and choose an option from the dropdown menu. In the Validation Value field place a numeric value for the validation to check before allowing the Item to be sold. If an Item requires any input, such as age, select the checkbox to the left side of the Input Required option. Select the checkbox next to the left side of the Show Alert Text on Receipt option to enable a message to be printed on the POS receipt and enter the message in the Receipt Alert Text field. Then select Save at the bottom right side of the page.
Note:
To cancel this process at any time, select the Cancel button on the bottom right side of the page to return to the Item Alert Message screen.
Step by Step Summary
- Select Items on the left side of the Navigation Menu, and then select Item Alert Messages under the listings.
- Select the Add Message button on the top right side of the Item Alert Messages page.
- Input the Message to be displayed in the Message field.
- Select an option from the dropdown menu for the Message Type and Validation Type fields.
- Input a Validation Value if required.
- Select the checkbox to the right side of the Input Required field if input is required.
- Select the checkbox next to the left side of the Show Alert Text on Receipt option and enter the message in the Receipt Alert Text field.
- Select Save on the bottom right side of the screen.
Concept Information
Related Tasks
How to Add a Subcategory or Group
How to Delete Categories, Subcategories, or Groups
How to Deactivate or Reactivate a Category Subcategory Group or Item
How to Edit a Category Subcategory or Group
How to Move Categories, Subcategories or Groups
How to Edit Items for a Location
How to Automatically Create Item Screens From the Item Library
How to Manually Arrange Item Screens and Items
How to Move an Item or Multiple Items