How to Apply a Discount
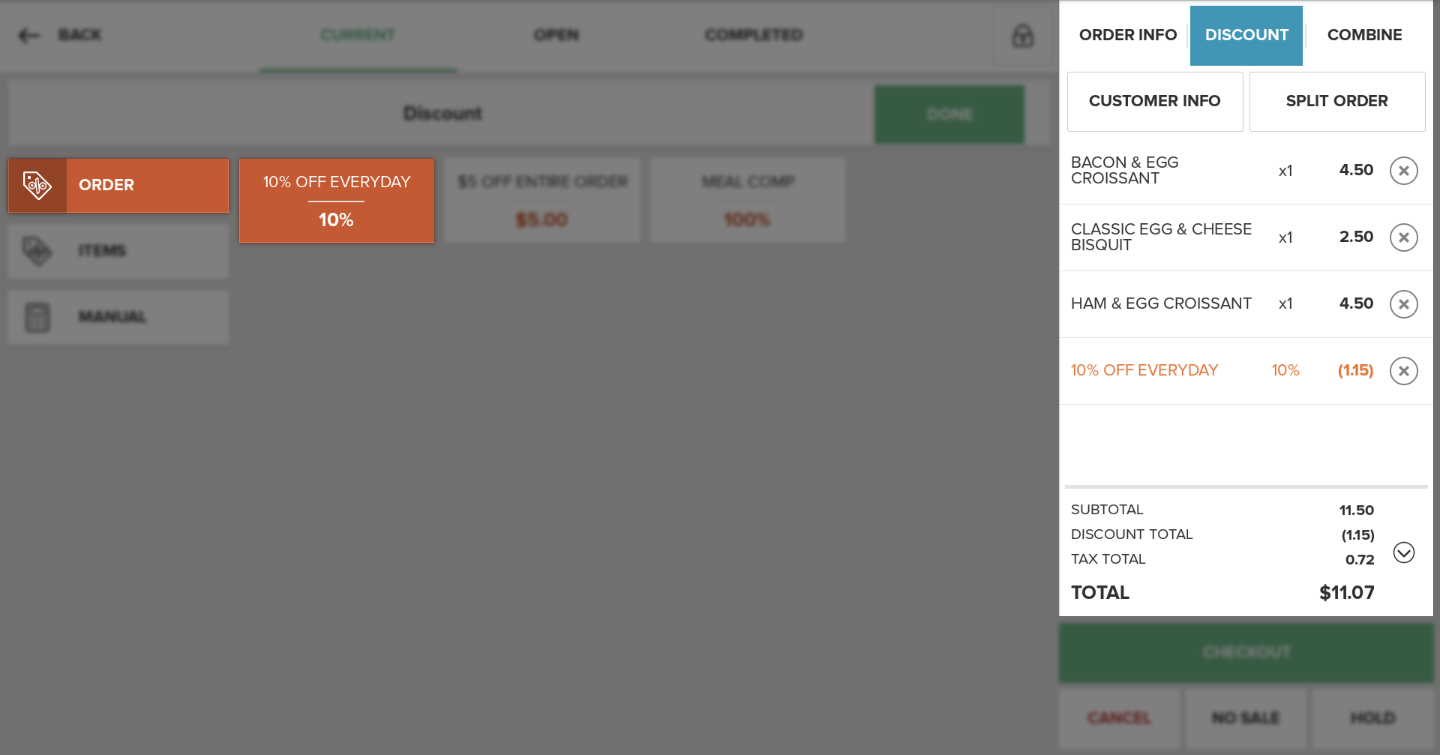
The application of a Discount to an Order is a permission based feature. If you have the proper permissions, selecting the Discount Button will allow you to apply different Discounts to an Order. Once applied, the Discount will be displayed in the Receipt Viewer on the right side of the screen, along with the percentage and/or dollar amount of the Discount.
Note:
It is necessary to first add an item to an order before a discount can be applied. If a discount is greater than the price of the items in the order, the order total will be set to zero. For information on how to create Discounts, click here.
Order Discount
To add an Entire Order Discount, tap the Discount Button above the Receipt Viewer. This will open the Discount Screen with the several types of Discounts (Order, Item, and Manual) available in a column on the left side of the screen. The Order Discount will be automatically selected and the Entire Order Discounts you previously created will be displayed in the center of the screen.
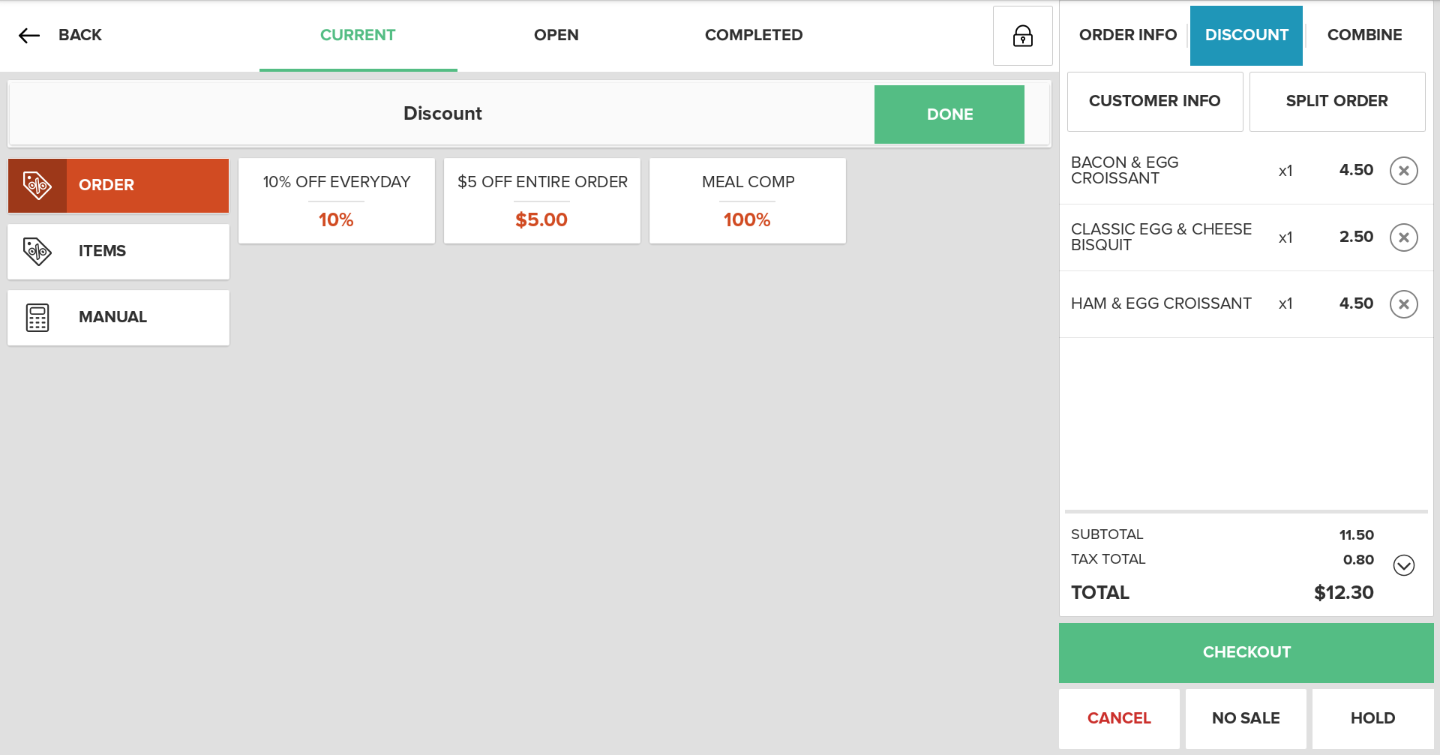
To add an Order Discount, tap on the Discount you wish to select from the list. The Discount will be applied and it will appear in the Receipt Viewer located on the right side of the screen. Press the Done Button when finished.
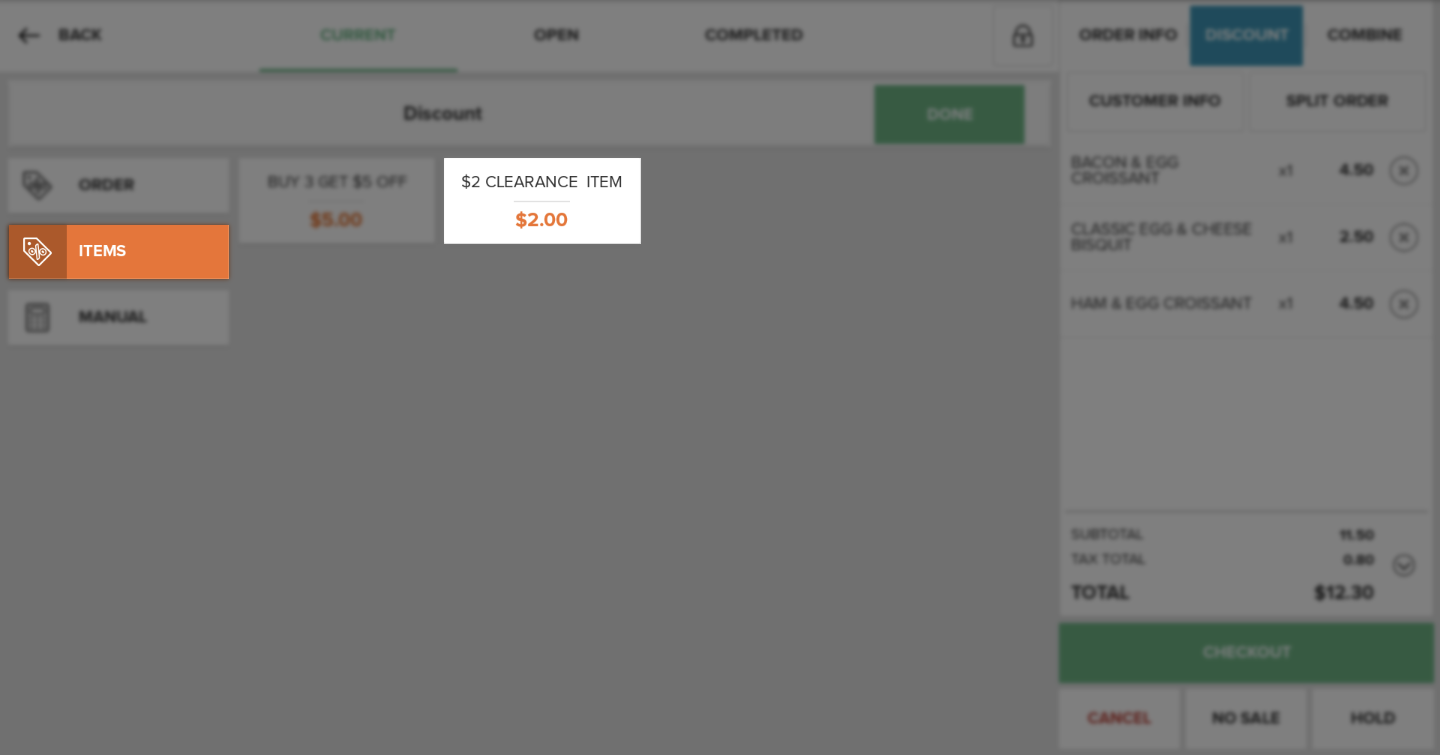
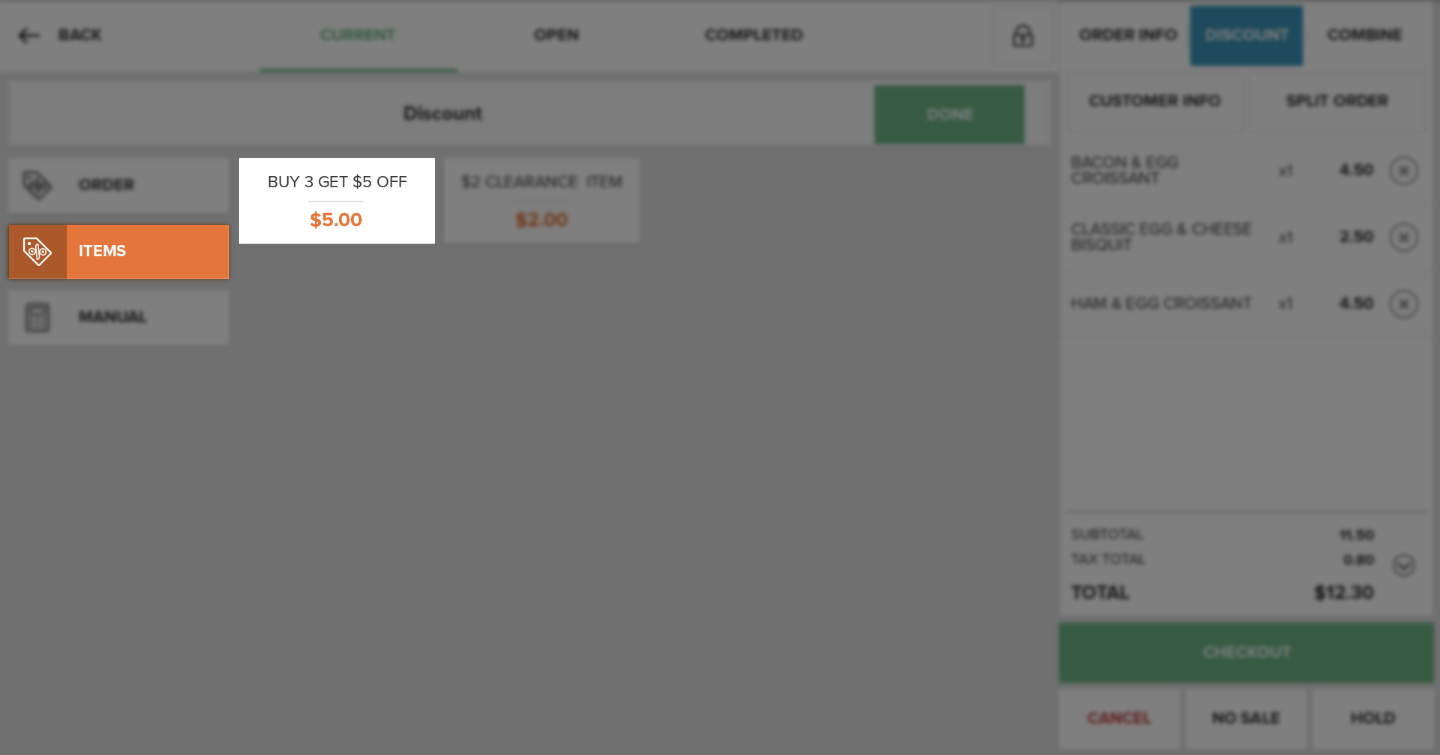
Item Discount
Single Item:
To add a Single Item Discount, tap the Discount Button above the Receipt Viewer. Then select the Item Button in the left column. A list of Discounts will appear in the center of the screen. In the list, tap on the Single Item Discount you wish to select.
A pop up will appear asking you to choose an Item to discount. Select an Item by tapping the check-mark on the right side of the Item. This will cause the check-mark to be highlighted blue. Select the Save Discount button at the bottom right when finished. The Discount will be applied and will now appear in the Receipt Viewer located on the right side of the screen. Press the Checkout Button when finished.

Multiple Item:
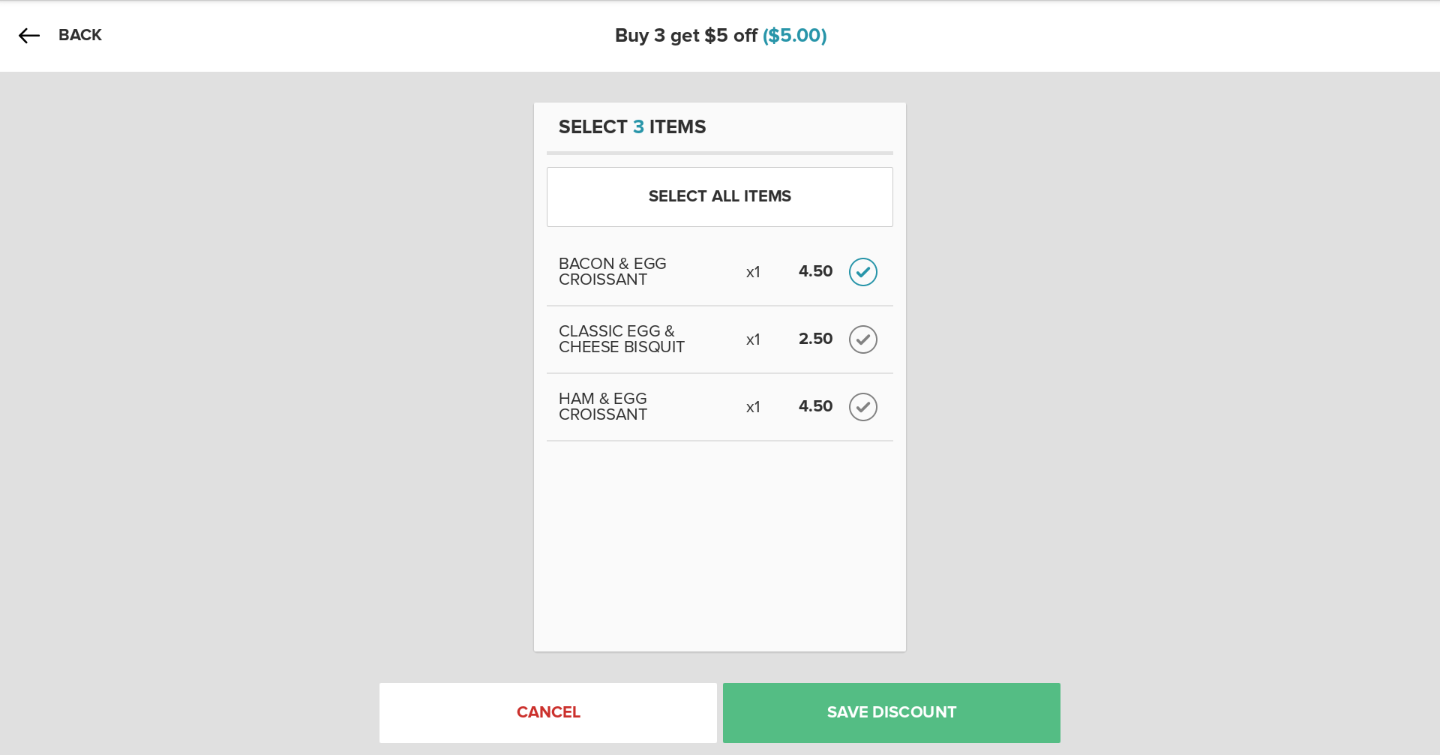
To add a Multiple Item Discount, tap the Discount Button above the Receipt Viewer. Then select the Item Button in the left column. A list of Discounts will appear in the center of the screen. In the list, tap on the Multiple Item Discount you wish to select.
A pop up will appear asking you to choose the Items you wish to discount. Select the Items by tapping the check-mark on the right side of each Item. This will cause the check-mark to be highlighted blue. Select the Save Discount button at the bottom right when finished. The Discount will be applied and will now appear in the Receipt Viewer located on the right side of the screen. Press the Checkout Button when finished.
Note:
The specified amount of Items required must be met before a Multiple Item Discount can be added to an Order. This can be an exact number,(Ex. 3 Items), or a range of numbers,(Ex. 3 to 5 Items).
Manual Discount
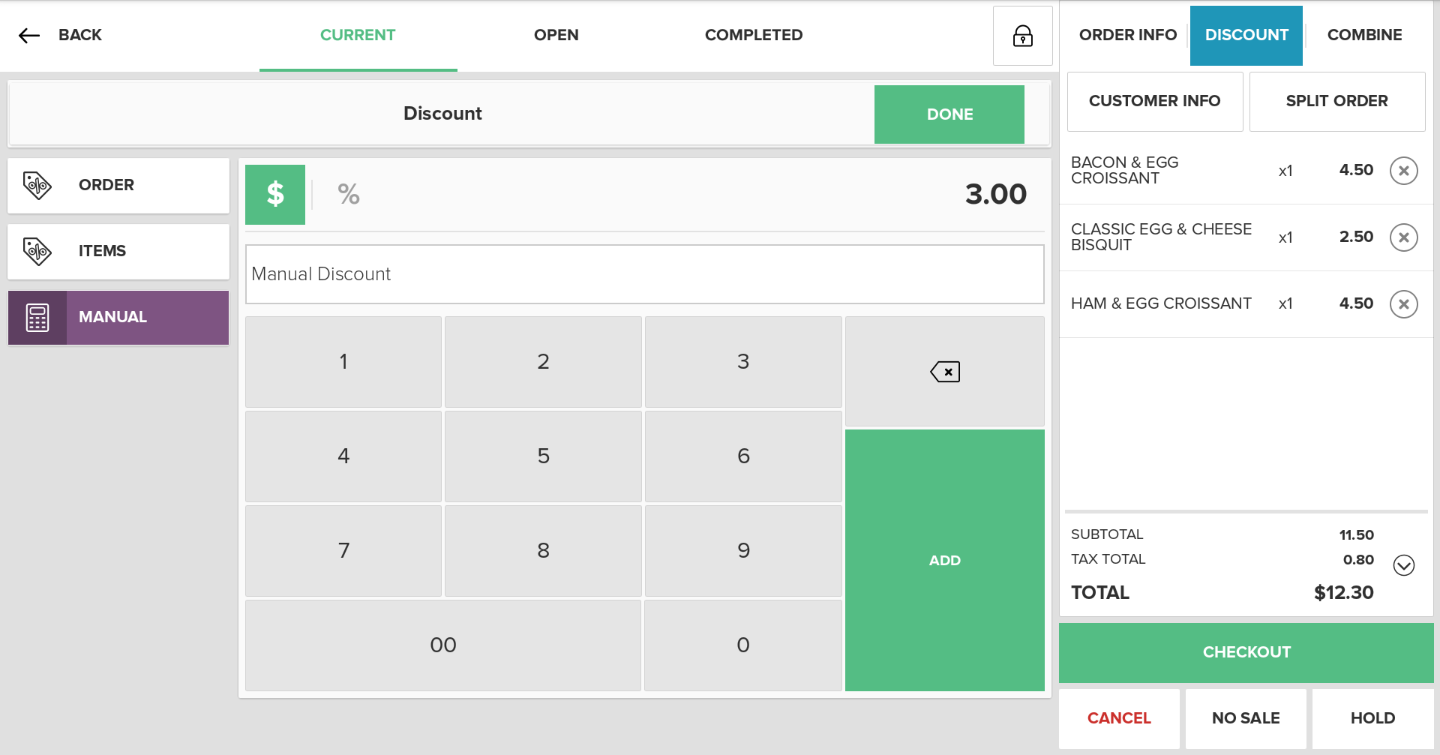
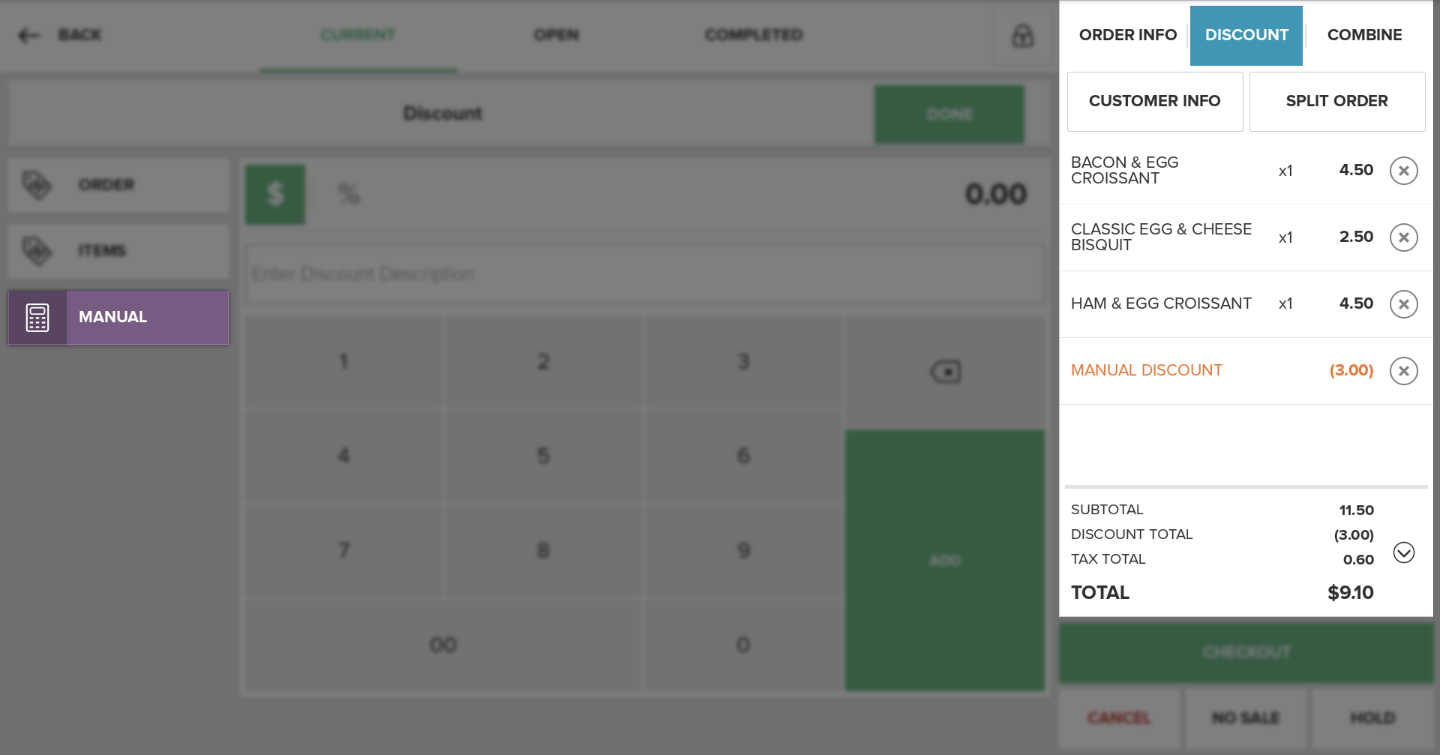
To add a Manual Discount, tap the Manual Button in the left column. If the person logged into Vital Select has the necessary permissions to add a Manual Discount, a keypad will appear in the center of the screen where they can type in the amount of the Discount, and choose whether it is a Dollar Amount or Percentage Discount. They can also enter an optional name for the Discount. Press the Add Button to add the Discount to the Order.
The Manual Discount will now appear in the Receipt Viewer located on the right side of the screen. Press the Done Button when finished.
Scan Discount Coupon
If there is a scanner enabled on the Vital Select you can scan a coupon to add the associated discount to the order. The Discount is required to have a SKU or Code to correspond with so that it can be added to the order when scanned.
To scan a coupon to add a Discount to the order begin by pressing the Orders button on the Home screen and then add an Item to the cart. Next located the coupon associated with the discount and scan the coupon. The Discount will automatically be added to the order. If the associated Discount is an item level Discount, such as a multiple item or single item Discount, then you will be directed to the item selection screen when the coupon is scanned to choose which items you want to apply the discount to.
Note:
If the coupon is already added to the order and the coupon is scanned a second time, the Discount will then be removed from the order.
Step by Step Summary
To add an Order Discount
- Tap the Discount Button above the Receipt Viewer
- Select the Discount you wish to apply
- Select done when finished
To add an Item Discount
- Tap the Discount Button above the Receipt Viewer
- Select the Item Button in the left column
- Select wither a Single or Multiple Item Discount
- Choose which Items to discount on the pop-up that appears
- Select Save Discount
To add a Manual Discount
- Tap the Discount Button above the Receipt Viewer
- Select the Manual Button in the left column
- Using the keypad that appears in the center of the screen, enter the amount of the Discount
- Choose whether the Discount is a Dollar Amount Off or a Percentage Off
- Enter an optional name for the Discount in the textbox
- Press the Add Button
To Scan a Discount Coupon
- Enable scanner on POS
- Press the Orders button on the Home screen
- Add items to the order
- Scan coupon to add Discount
- If Discount is item level, choose which items the discount will be applied to
Concept Information
Related Tasks
How to Enter an Item amount at time of use
How to Apply a Modifier to an Item
How to Increase Quantities in Orders
How to Split an Order by Items
How to View and Edit Order Info
How to Add partial quantities Using the App
How to Remove Items from an Order
How to Perform a Manager Override