How to Apply a Modifier to an Item
Apply a Modifier to an Item from the Receipt Viewer
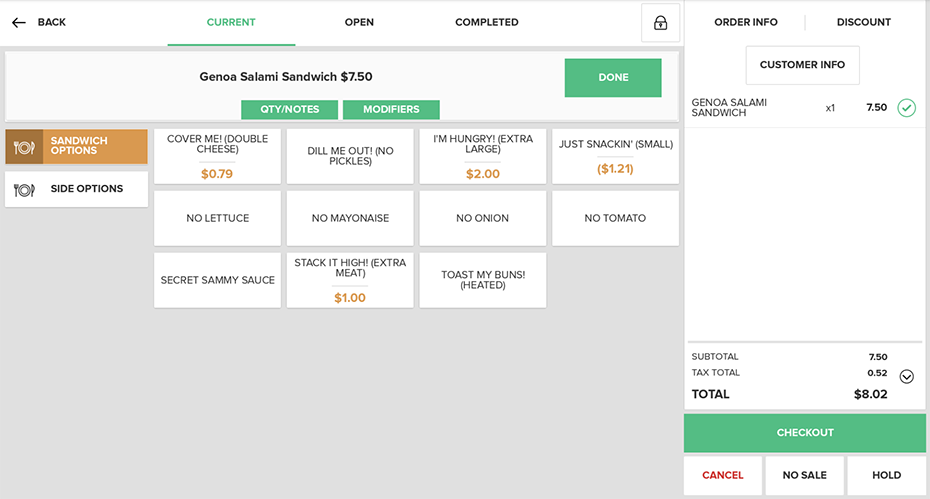
Once you have selected an Item for an Order, if Modifiers have previously been enabled for that particular Item in the Portal, you may add Modifiers to that Item. Once the Item is added to the Order, tap the Item in the Receipt Viewer. The Edit Item Screen will appear in the center of the screen. Select the Modifiers Tab. The Modifier Sets that were assigned to that Item will be listed in a column on the left side of the screen. Select the appropriate Modifier Set, and then tap the Modifier Button in the center of the screen to apply that Modifier to the Item. The Modifier Button will change color to show that it has been applied, and you will see the Modifier listed under the Item in the Receipt Viewer. Tap the Done Button when finished.
Step by Step Summary
- Make sure Modifiers are enabled for the Item in the Portal. For information on creating, editing, and assigning Modifiers, click here.
- Tap the Item you want to modify in the Receipt Viewer. The Edit Item Screen will appear in the center of the screen.
- Select the Modifiers Tab.
- Select the appropriate Modifier Set from the left column, and then tap the Modifier Button in the center of the screen to apply that Modifier to the Item.
- The Modifier Button will change color to show that it has been applied, and you will see the Modifier listed under the Item in the Receipt Viewer.
- Tap the Done Button when finished.
Apply a Required Modifier to an Item
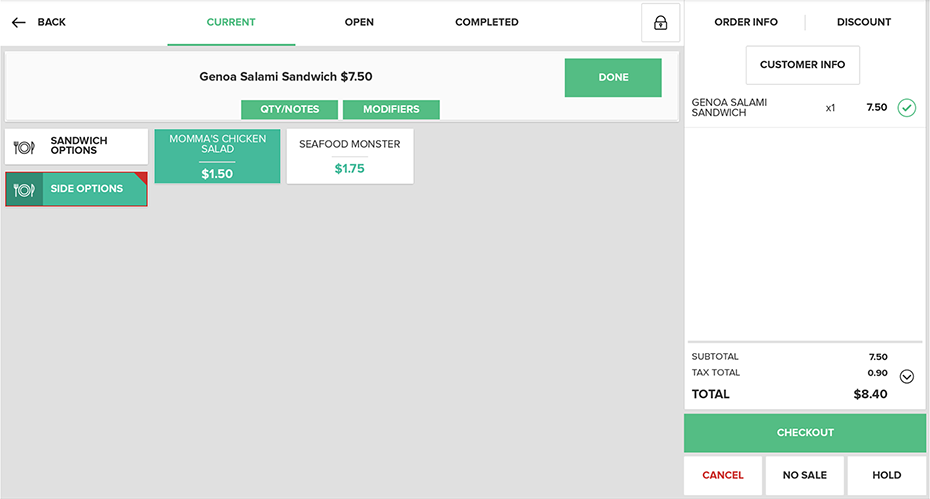
Some Items may have Required Modifiers assigned to them. When you add an Item to an Order that has Required Modifiers, as soon as you tap the Item to add it to the Order, the Edit Item Screen will fill the center of the screen. The Modifier Tab will be preselected, as will the Required Modifier Set that includes the group of Modifiers from which you must choose a Modifier for the Item. If there is more than one Required Modifier for that Item, the Modifier Set Button(s) with the Required Modifier(s) in it will have a flag on it to indicate you must tap it and select a Modifier from that Set.
For more information about how to assign Modifier Sets to Items, click here.
Step by Step Summary
- Assign a Required Modifier Set to an Item in the Portal.
- Add an Item with a Required Modifier to an Order, the Edit Item Screen will automatically fill the center of the screen.
- Select a Modifier from the preselected Modifier Set.
- If there is more than one Required Modifier for that Item, the Modifier Set Button(s) with the Required Modifier(s) in it will have a flag on it to indicate you must tap it and select a Modifier from that Set.
- Continue until all Required Modifiers have been added to the Item.
- Tap the Done Button when finished.
How to Use Default Modifiers
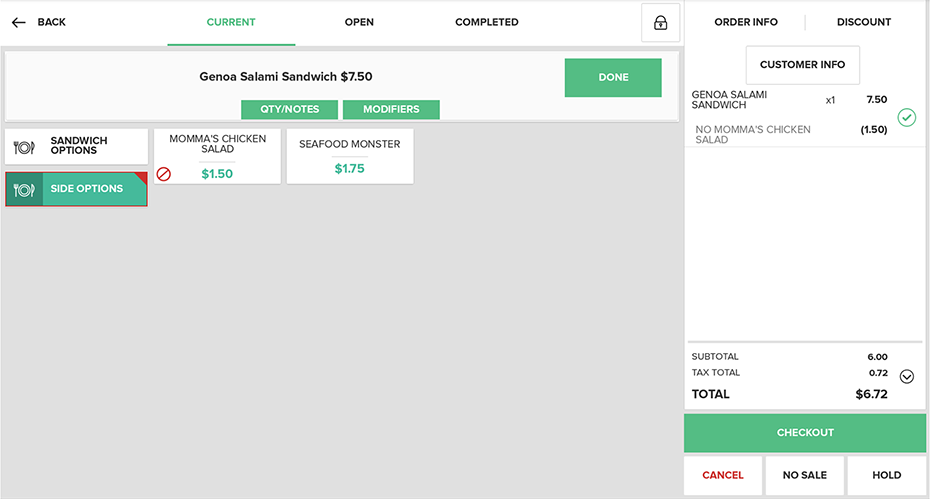
If you would like to expressly exclude a Default Modifier, tap the Item in the Receipt Viewer to bring up the Edit Item Screen. Select the Modifier Tab and find the Modifier that you would like to remove.
Tap the relevant Modifier Button. A “No” symbol will appear on the Modifier Button and a No Modifier will appear underneath the corresponding Item in the Receipt Viewer. For example, if your Cheese Burger normally comes with cheese, pickles, and ketchup, you can create a modifier set and mark the cheese, pickles, and ketchup modifiers as being default modifiers. When entering an order that includes a Cheese Burger, if a customer asks for the burger without pickles, you will simply press on the pickles modifier in the Modifier Tab of the Edit Item Screen and it will be deselected. The receipt viewer will be updated to show a “No Pickles” modifier below Cheese Burger.
For information on creating Default Modifiers, click here.
Step by Step Summary
- Set up Default Modifiers and apply them to Items in the Portal.
- Tap the Item you want to remove a Modifier from in the Receipt Viewer to open the Edit Item Screen.
- Select the Modifier Tab and find the Modifier that you would like to remove.
- Tap the Modifier Button to remove it from the Item.
- A circle backslash symbol will appear on the Modifier Button and No Modifier will appear underneath the corresponding Item in the Receipt Viewer.
- Press the Done Button when finished.
Concept Information
Related Tasks
How to Enter an Item amount at time of use
How to Increase Quantities in Orders
How to Split an Order by Items
How to View and Edit Order Info
How to Add partial quantities Using the App
How to Remove Items from an Order
How to Perform a Manager Override