How to Split an Order by Items
There may be times when you need to split an Order before starting the Checkout Process. Most likely this will happen because your customers want to split the Order by the Items in it, rather than splitting the balance of the entire Order. In this scenario, you will want to use the Split by Items Process on your Vital Select.
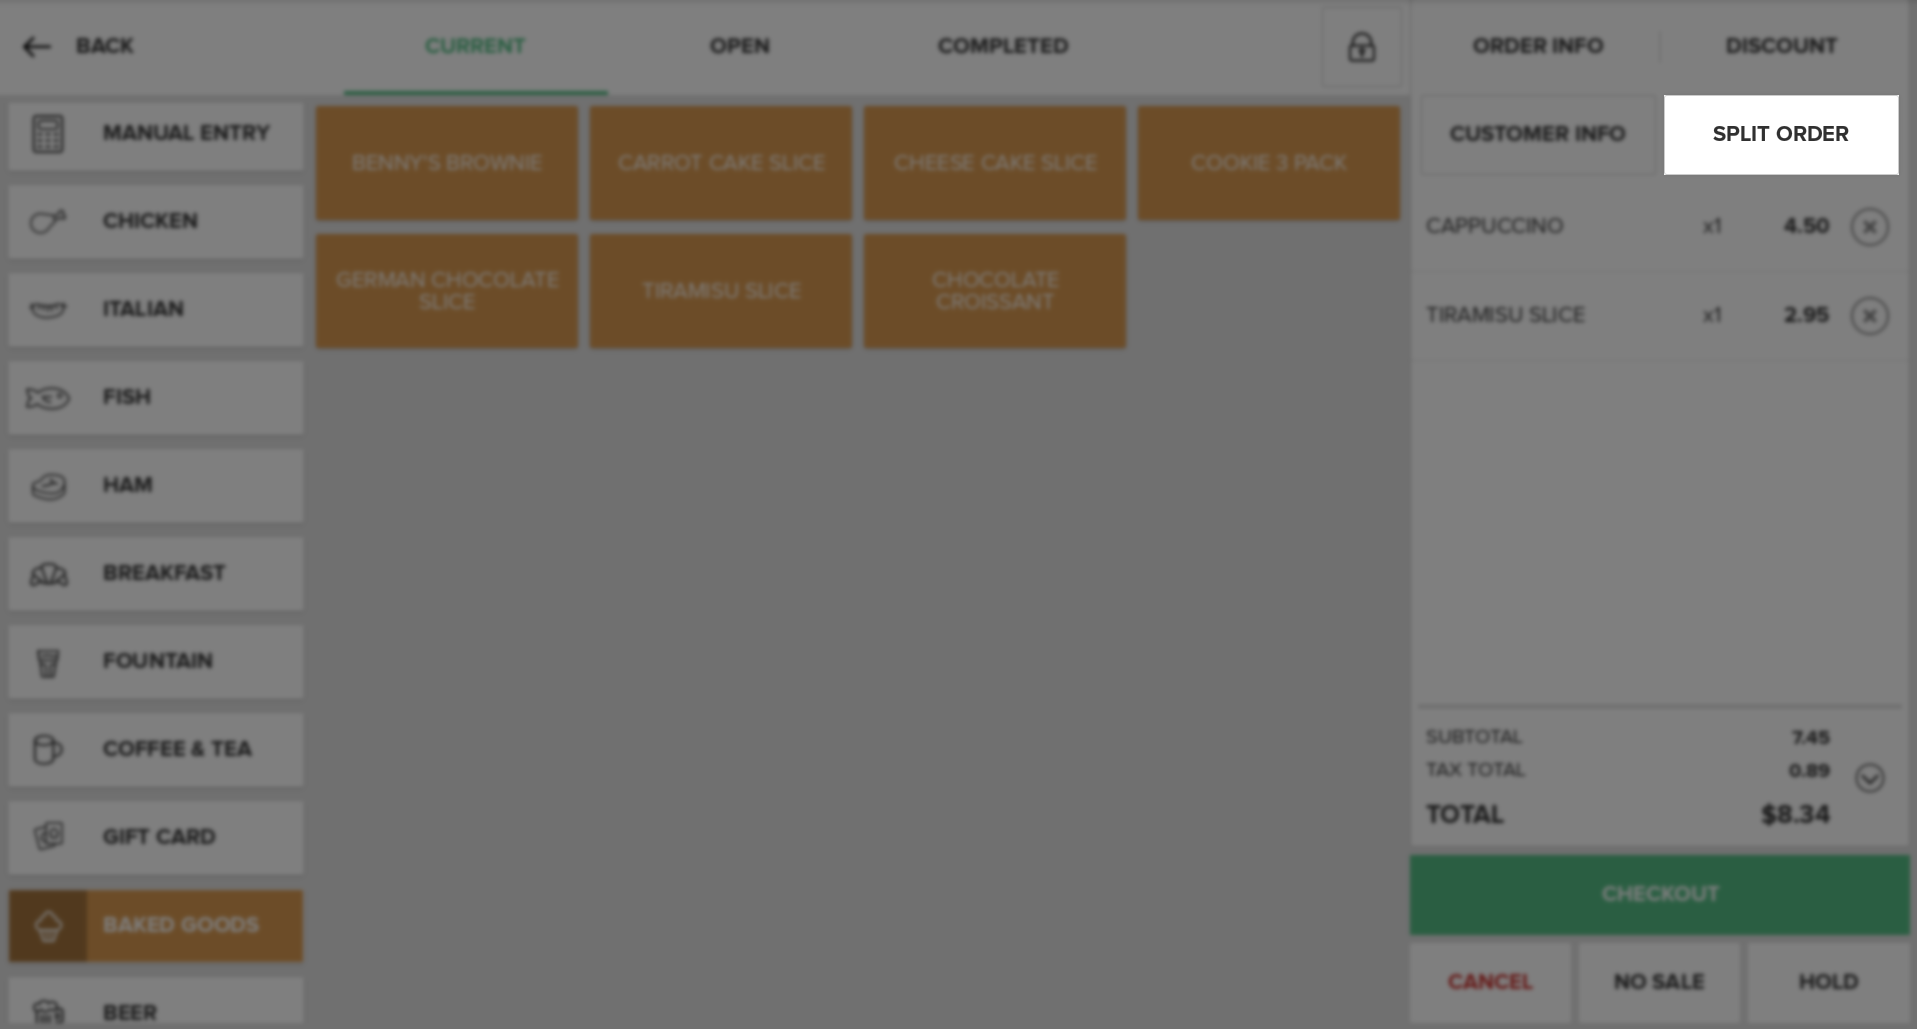
You can begin the Split by Items Process from either the Current Orders Tab or the Open Orders Tab. On the Current Orders Tab, after you have added at least two Items to the Order, press the Split Order Button at the top of the Receipt Viewer. On the Open Order Tab, first locate the Order Tile with the Order you wish to split. Tap the tile to load the Order Information in the Receipt Viewer. Then press the Split Order Button above the Receipt Viewer.
Note:
There must always be at least two Items in an Order for you to be able to Split by Items. Otherwise, you will need to Split by Balance .
Once you are on the Split by Items Screen, you will see the Order Ticket with each Item listed, along with its Quantity and Price, as well as the Subtotal, Tax Total, and Order Total. Below the Order Ticket is a Hold Button.
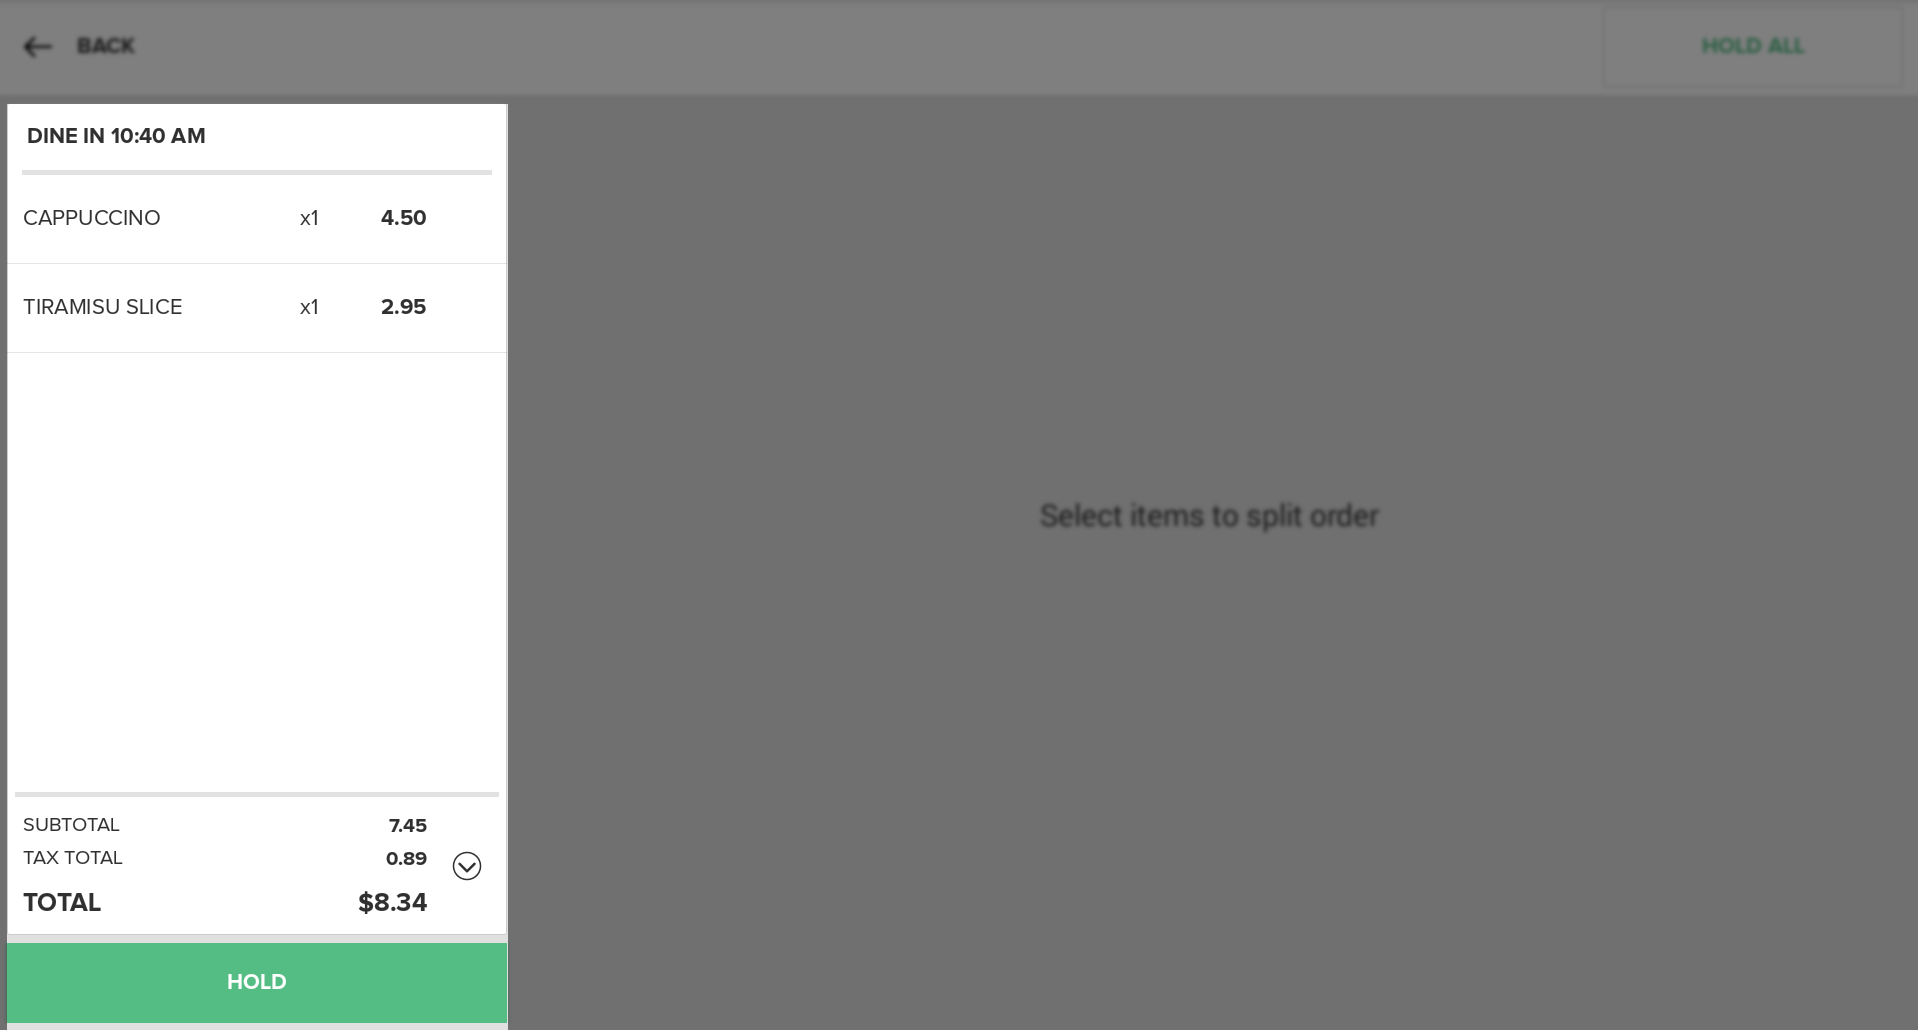
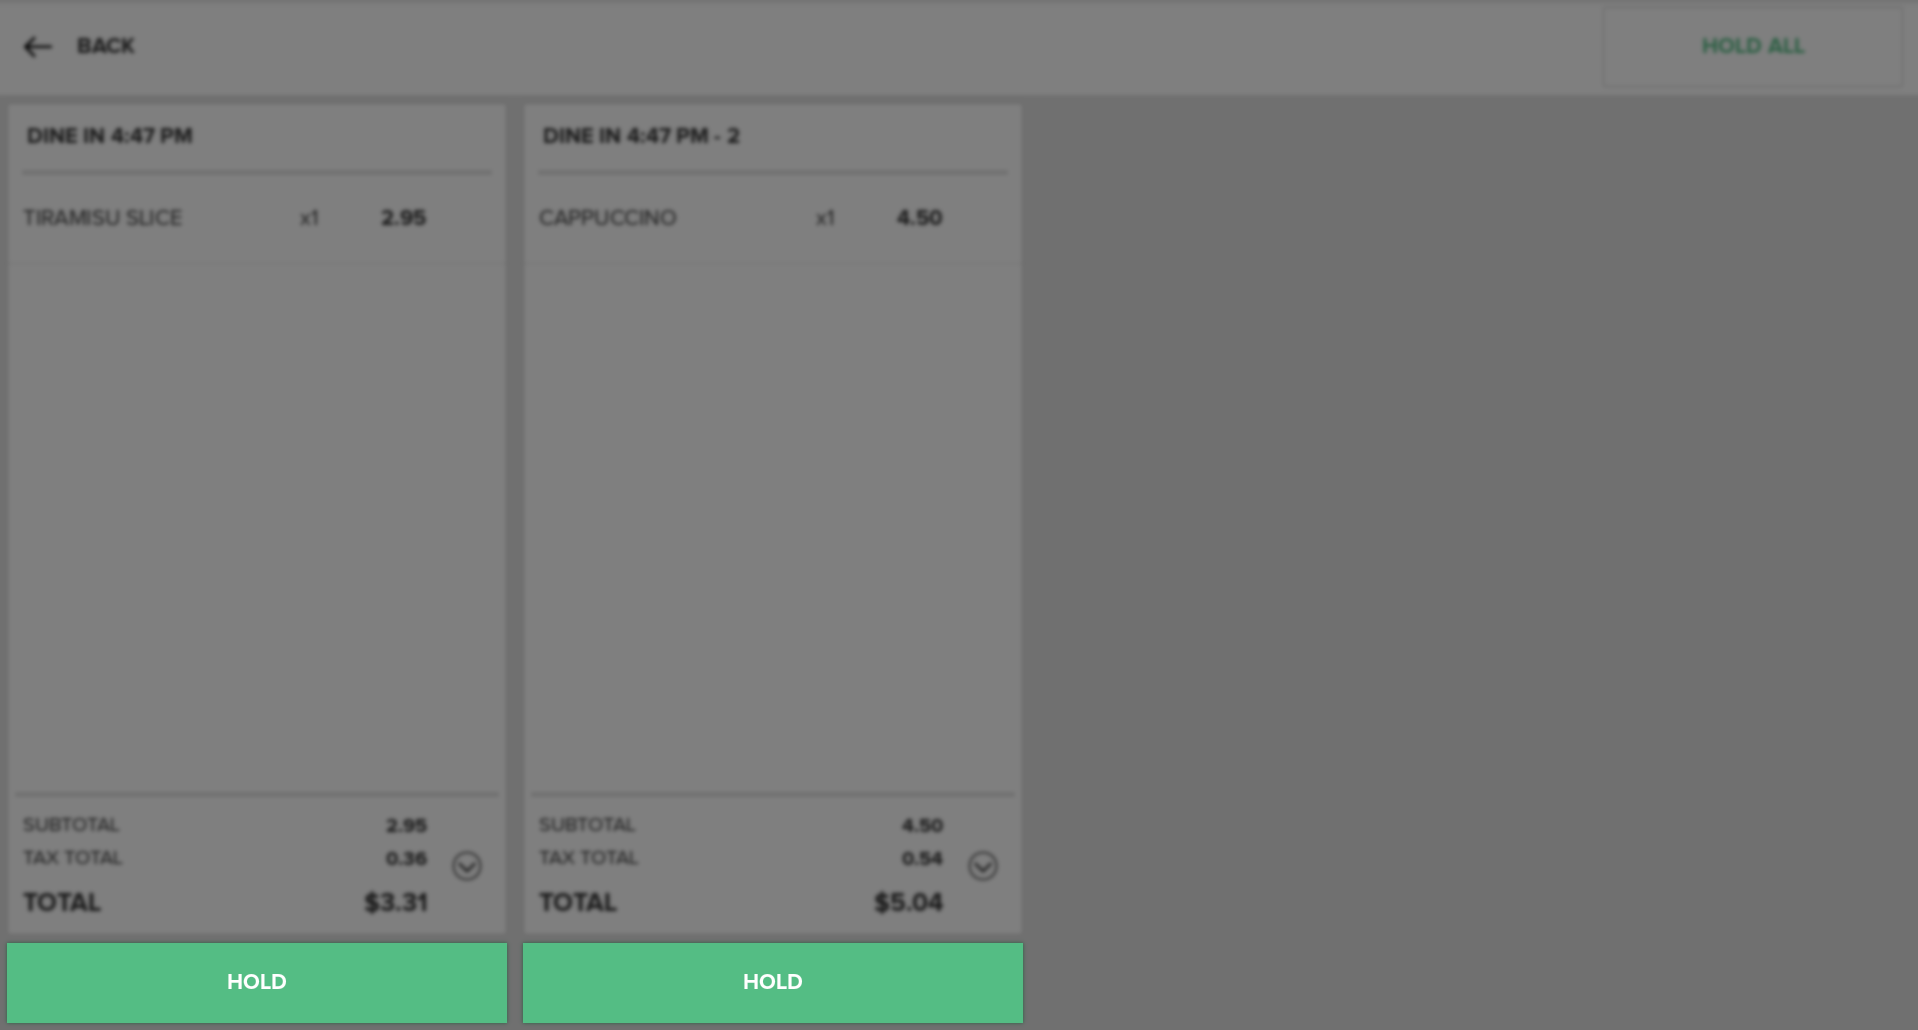
Tap the Item(s) you would like to move to a different Order Ticket. The Hold Button below the Order Ticket will change to say Create New Order. Press the Create New Order Button. A new Order Ticket will be created with the selected Item(s). If there are additional Items that need to be added to the newly created Order Ticket, tap them and then press the Move Here Button below the new Order Ticket.If there are Items on the original Order Ticket that need to be added to an additional new Order Ticket, tap the appropriate Item(s) and then tap the Create New Order Button below the original Order Ticket.

Once you have created all the necessary Order Tickets, you will need to place the Orders on hold. There are three ways to do this. First, you can choose to press the Hold Button or Hold and Send Button below each individual Order Ticket.
Second, you can choose to place all of the new Orders on hold by pressing the Hold All Button in the top right corner of the screen.
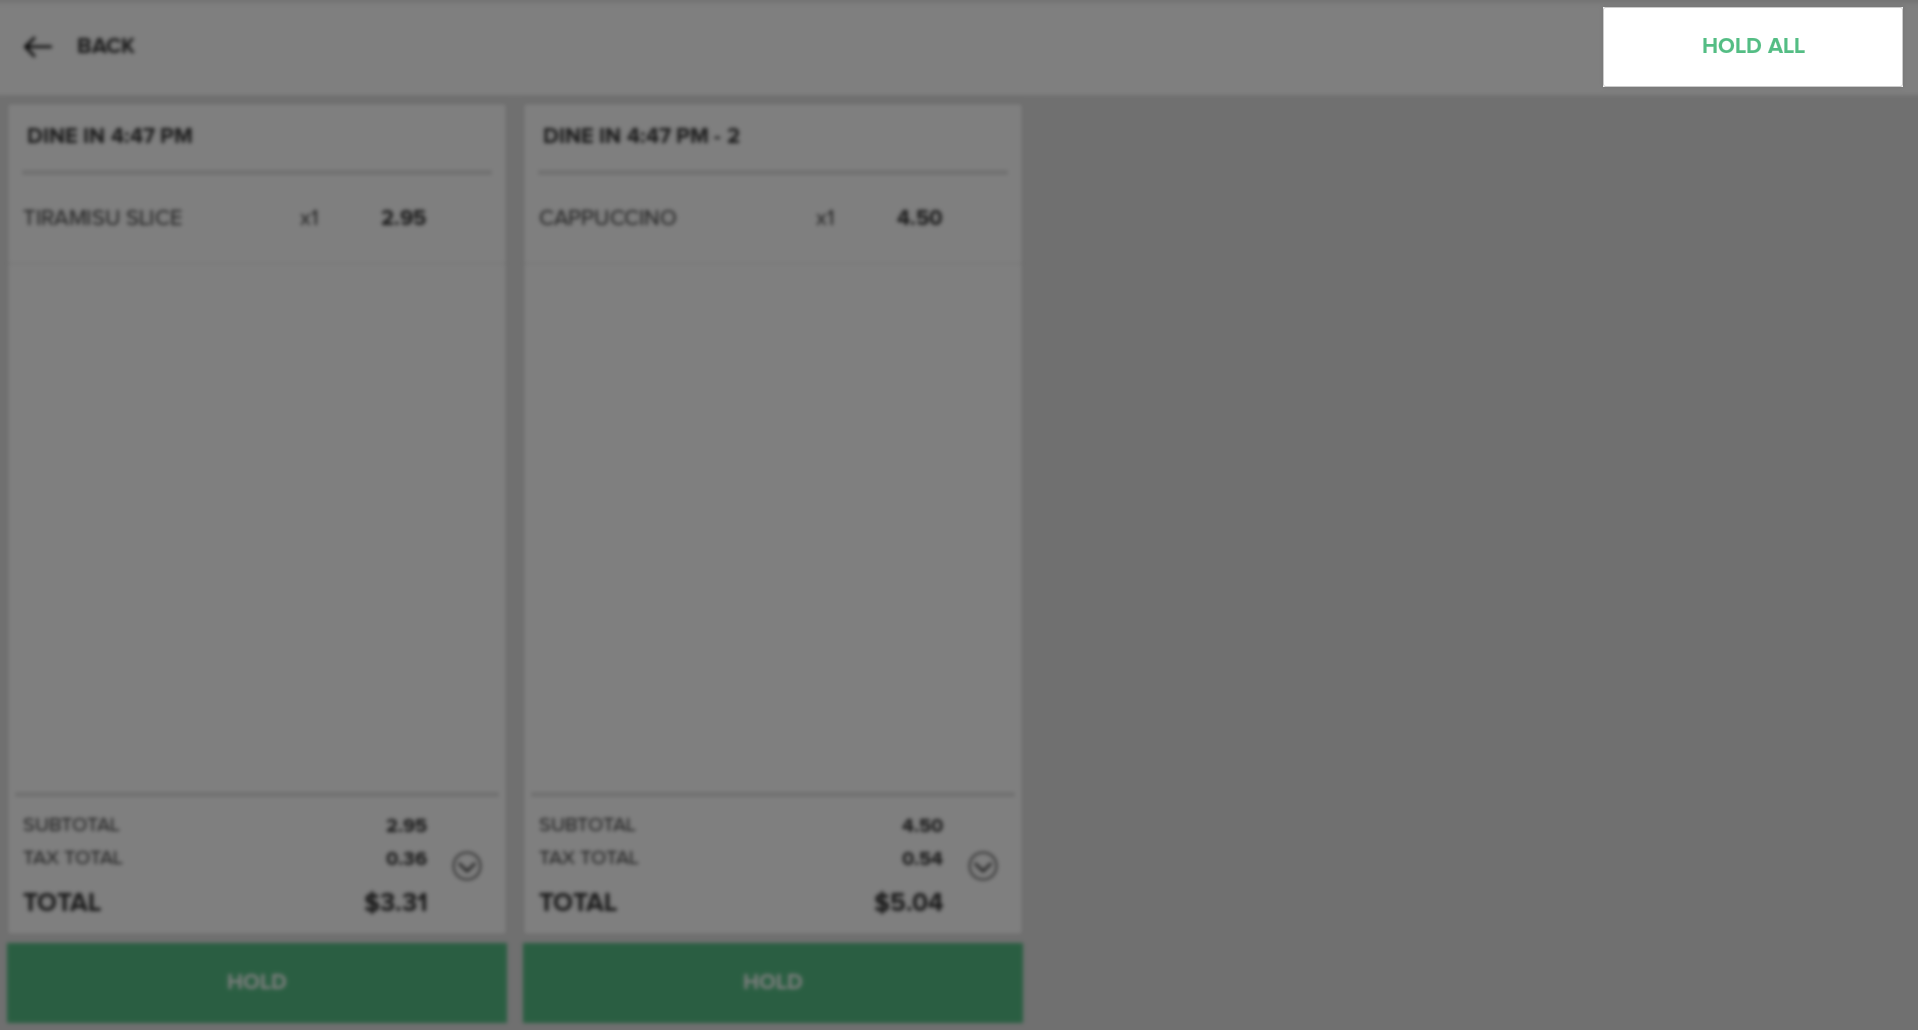
Finally, you can place all the Orders on hold and send any Unprinted Items to the necessary Stations for printing by pressing the Hold All and Send Button in the top right corner of the screen.
Note:
Pressing the Hold and Send Button will send any Unprinted Items to the designated Station to be printed. Only select Hold and Send if you are ready for the Items to be sent to their Station.
Step By Step Summary
Select the Orders Button on the Home Screen
- On the Current Order Tab:
- Add two or more Items to an Order
- Press the Split Order Button at the top of the Receipt Viewer
- On the Open Order Tab:
- Locate the Order you would like to split into multiple tickets and tap it to load the Order Information in the Receipt Viewer
- Press the Split Order Button at the top of the Receipt Viewer
- On the Split Order Screen, tap the Item(s) you want to move to a new Order Ticket
- Press the Create New Order Button
- Select any other Item(s) that need to be moved to a separate Order Ticket
- Press Create New Order to make a new Order Ticket for those Items, OR
- Press Move Here to move the Items to an Order Ticket other than the one it is currently on
- Once you have split the Items onto the necessary Order Tickets, press the Hold All Button in the top right corner.
- If there are Items that need to be sent to a Station to be printed, and you are ready to send these Items, press the Hold All and Send Button.
- Alternatively, you can choose to press the Hold or Hold and Send Button below each individual Order Ticket.
Concept Information
Related Tasks
How to Enter an Item amount at time of use
How to Apply a Modifier to an Item
How to Increase Quantities in Orders
How to View and Edit Order Info
How to Add partial quantities Using the App
How to Remove Items from an Order
How to Perform a Manager Override
How to Apply Tax Exempt to an Order
How to Apply Tax Exempt to a Manual Item
How To Checkout Using A Credit Card
How to Remove a Tender from an Order
How to Return to or Cancel an Order During Checkout
How To Checkout Using A Debit Card
How to Use the Signature Screen
How to Use the Tip Screen During Checkout